How difficult is it to mill circles?

Yes, it can be legal to make a silencer. For everything Form-1, from silencer designs that are easily made, to filing forms with the BATF, to 3D modeling. Remember, you must have an approved BATF Form-1 to make a silencer. All NFA laws apply.

Moderators: mpallett, bakerjw

User avatar
Fudmottin
Silent But Deadly
Posts: 1166
Joined: Sat Jan 31, 2009 5:36 pm

How difficult is it to mill circles?

Post by Fudmottin »

Given a totally manual mini-mill and aluminum block, just how difficult is it to learn to mill out circles? Let me expand on that if you will.

This is my current concept for a box suppressor for a PPK/S (although the design should be adaptable to other pistols):


Image

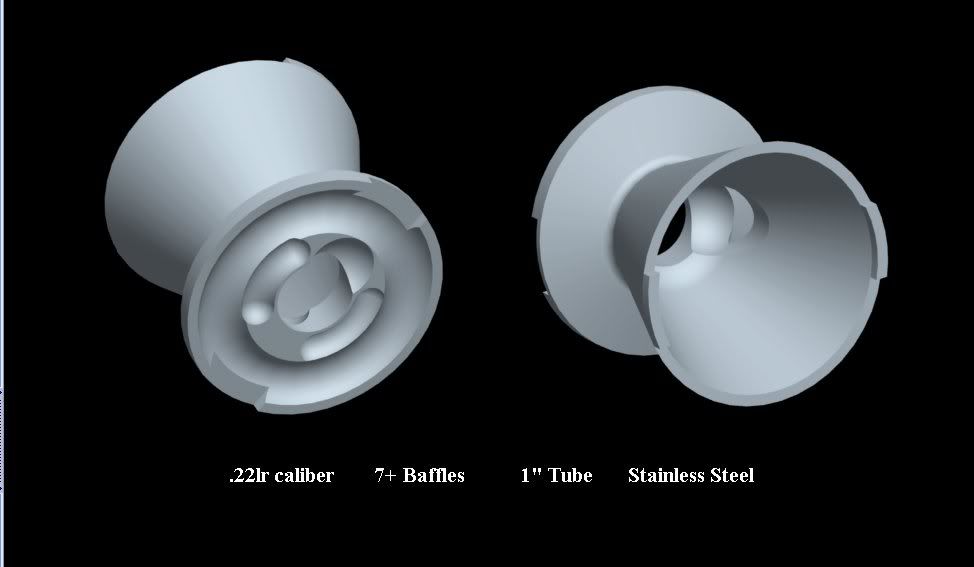
As you can no doubt tell, the baffles are a profile of a cone. I made them that way because going in a straight line is pretty easy when cranking just one wheel. However, my inner imagination is telling me that circles would work better. That is, imagine a cylinder of appropriate radius and wall thickness normal to the box. This provides a nice differentiable curve to direct the gases away from the exit aperture and swirl them about inside the box.

In addition to being a differentiable curve, less surface area would be used. This means less volume of material in the box. More room for gas to expand.

I have to be realistic because I only get one tax stamp to work with for a given suppressor. I don't know exactly what I can and can not do within the law when I get my tax stamp. That is, can I dispose of many failures before getting the silencer I envisioned? I imagine that is a bit hypothetical since the BATFE does not have probable cause to see what I am doing in my own home. But the only realistic way to test is to go to a firing range that is about sixty miles from me. Many members are LEO. So I could be asked to present my stamped form. Well a copy anyway.

Sadly suppressors are not common at the range.

I'm sorry to conflate both legal and technical issues here. But as an honest citizen, I don't want to violate NFA + GCA rules when I am practicing with material in preparation for building an NFA regulated item.

Perhaps a simpler question would be, how do I mill arcs into a piece of plate metal with an end mill? Is that the correct tool for the job?

The baffles in the current model of the design mark three points which is sufficient to define a circle. Presumably machinists know geometry.

While I'm here, I've specified 0.125" walls. That chews up a lot of volume. While the box takes up 11ci, the inside volume is only about 6ci. I don't know how much pressure 6061 T6 or a more appropriate Al alloy can take without flexing significantly. The whole point of going with a box is to increase the internal volume in relation to the exterior size. Also I don't want to block the sights, such as they are, on the pistol. If anyone can give me some guidance on a wall thickness that will not burst or otherwise fail under pressure, I would be most grateful.
User avatar
WhisperFan
Silent But Deadly
Posts: 1551
Joined: Sat Jun 16, 2007 8:08 pm

Post by WhisperFan »

Arcs, circles and curves are much easier to be made on a plasma cutter, or a mill with a proto-trac.

Cutting an accurate circle by hand is very, very, difficult.

If it were me, and I was trying to make cones with an off-center hole and I wanted them to fit tight to a tube;

I think I would make the cones slightly over size. I'd also make a jig to stack them that has a rod that will index the bore holes together. Then I would put them on a lathe and true them up and bring them to size - between centers.

They wouldn't be held very tightly, but taking very small passess with plenyt of lube/coolant should make it work.
As nightfall does not come all at once, neither does oppression. In both instances, there is a twilight when everything remains seemingly unchanged. And it is in such a twilight that we all must be aware of change in the air -- however slight -- lest we become unwilling victims of the darkness.
Justice William O. Douglas
User avatar
Conqueror
Elite Member
Posts: 4809
Joined: Mon May 14, 2007 9:24 pm
Location: RTP, NC

Post by Conqueror »

Milling an accurate circle on a manual mill with only X/Y/Z axes is essentially impossible. You would want a rotary table or something.
[b]Quis custodiet ipsos custodes?[/b]
mactool
Member
Posts: 27
Joined: Wed Jul 11, 2007 12:11 pm

Post by mactool »

there is 2 other options.
1: mill the arc by a point to point motion. The points being calculated beforehand. Thr arc doesent need to be very nice, which increases the turbulence
2: Rough out the desired contour, and then last use a homemade shaper tool. The shaper tool should only move in the z direction. Thr shapertool it self is pretty easy to make from a round bar.
User avatar
Fudmottin
Silent But Deadly
Posts: 1166
Joined: Sat Jan 31, 2009 5:36 pm

Post by Fudmottin »

I was afraid of that. I'm not a rich hobbyist. If I were, I wouldn't be shopping at Harbor Freight so much as looking for the big stuff and having people figure out how to get it down a flight of stairs for me.

I should point out that the model pictured is a monolithic piece. It is intended to be milled from a piece of 1x2 bar stock. It doesn't show all the features needed for attaching the side plate to seal it.

The baffles don't have to be perfect. But I don't want them to look sloppy either since I would like to be able to show off the interior to interested persons.

The critical bits are the bore hole, concentric hole for the thread insert, and the not shown dovetails or grooves for the side plate to slide into and then be secured by screws.

I'm not really sure how much gas cares about baffle perfection. I am pretty sure that I can't work two wheels on a mill any better than I could on an Etch-O-Sketch which I couldn't do parametric curves on either.

As far as rotary tables go, I do have this accessory:

http://www.harborfreight.com/cpi/ctaf/D ... mber=47824

I do not know if this is helpful in this application.

I could still use some guidance as to wall thickness. Even if the removable side plate needs to be thicker in order to not flex, I can do that.

My planned steps are:

1) Square the stock
2) Drill the bore hole
3) Drill the insert hole concentric to the bore hole
4) Remove material on one side to a depth equal to the side plate thickness.
5) Mill, router the slots for the side plate
6) Make the side plate and test fit
7) Mill the main body to shape in rendering
8) Drill and tap holes for side plate
9) Drill matching holes with counter sink in side plate
10) Test assembly for fit
11) Install and index thread insert made in a separate process on lathe
12) NFA required engraving on main block
13) Anodize with home anodizing kit with golden finish

That should yield a completed silencer.

ETA: Mactool slipped his post in while I was proof reading my response.
User avatar
Fudmottin
Silent But Deadly
Posts: 1166
Joined: Sat Jan 31, 2009 5:36 pm

Post by Fudmottin »

mactool wrote:1: mill the arc by a point to point motion. The points being calculated beforehand. Thr arc doesent need to be very nice, which increases the turbulence.
While obviously time consuming and all, this idea kind of appeals to me. I guess instead of making a circular arc, it is more like making a portion of an n-sided polygon. They used to calculate Pi that way to great precision.
Hatchetjoe
Silent But Deadly
Posts: 185
Joined: Mon Jul 07, 2008 6:12 pm

Post by Hatchetjoe »

Just a couple of thoughts:

1. Use segments of tube for your baffles
2. cut grooves in the top of the body for top locations
3. Make slotted dowels/bolts for the bottom anchors
4. using a basic bushing in the attaching thread drill the baffle holes

Just some basic thoughtsm these can easily be expanded on/
User avatar
GeneT
Silent But Deadly
Posts: 200
Joined: Sun Mar 23, 2008 12:30 pm
Location: Albany, OR

Post by GeneT »

You have a compound difficulty there. If you were to mill the baffles as separate pieces you could do so (kind of) on a rotary table, but you would still have the conical profile to deal with. Using steps and a ball end mill you could get close using point to point (step Z, mill circle, adjust diameter, repeat) but there would still be ridges depending on the size of your ball mill and the Z step. Alternately you could mill stepped baffles, which would be easier. If you want it to be monolithic a rotary table won't help you - you need EDM, water jet, or some similar cutting technology. (I doubt plasma would give you the surface finish you want). If I understand your desire for a monolithic block you may have a design which just isn't practical to do with no more than a manual mill. (I didn't say impossible...)

GsT
50 BMG Site:
www.hevanet.com/50shooter
User avatar
Rikky Lee
Silent But Deadly
Posts: 249
Joined: Wed Nov 19, 2008 9:22 pm

Post by Rikky Lee »

I think, for the first attempt, you will have a great deal of success and satisfaction going the freeze plug route as most the hard, initial forming on baffles is done for you. With the caliber you are dealing with, a short and simple design should prove effective and you should still be able to build a non-centrally mounted can.
User avatar
YugoRPK
Silent But Deadly
Posts: 6318
Joined: Wed Apr 02, 2008 2:56 am
Location: South Carolina

Post by YugoRPK »

rotary index's are not that expensive.
45_fan
Senior Silent Operator
Posts: 118
Joined: Sat Dec 27, 2008 11:57 pm

Post by 45_fan »

Use a cheap rotary and it will go fast. It is just a matter of position, rotate, repeat.

Not sure if it would save you weight or not, but you could drill your cover plate in the 4 corners and then 2 more in the middle for reinforcement. Those two could anchor directly to a bulge in a pair of baffles.
User avatar
DeltaPDesign
Silent Operator
Posts: 98
Joined: Thu Mar 05, 2009 1:01 pm

Here's one

Post by DeltaPDesign »

If you want to make the design above and only have a mini mill make it out of a single piece of material.

You will have to add some radii here and there, but then you could likely slap a side plate on it when done and call it good. It is only a one off anyway.
User avatar
Fudmottin
Silent But Deadly
Posts: 1166
Joined: Sat Jan 31, 2009 5:36 pm

Post by Fudmottin »

This is the type of rotary you guys are talking about, right?

http://www.harborfreight.com/cpi/ctaf/D ... mber=47824

The picture I posted is intended to be milled from a single piece of metal. It's dimensions are 1x2x5.25 inches. The walls are currently 0.125". The wall thickness robs much of the volume. What I would love to know is how thin I can make the walls for a 380 ACP out of 6061 T6 aluminum.

I haven't got that blue machinists spray paint yet (where do I find that?). But I expect I can scribe all sorts of things onto the block once I've got it squared up.
User avatar
Rikky Lee
Silent But Deadly
Posts: 249
Joined: Wed Nov 19, 2008 9:22 pm

Post by Rikky Lee »

What load are you running in the 380 ACP?
User avatar
Fudmottin
Silent But Deadly
Posts: 1166
Joined: Sat Jan 31, 2009 5:36 pm

Post by Fudmottin »

Whatever comes out of the box. Most often UMC 95gr FMJ.

I would load for it myself if brass didn't get tossed so far away there was no hope of finding it again. I would probably go with a light charge of bullseye and a 102gr golden saber with a 6 1/2 primer. I know that's small rifle. The Walther will light it.

The big problem with auto pistols is brass lossage. With 9x19mm, ammo is so cheap it isn't really worth the effort to load anyway. 380 is more expensive for some reason.
User avatar
Rikky Lee
Silent But Deadly
Posts: 249
Joined: Wed Nov 19, 2008 9:22 pm

Post by Rikky Lee »

Well the next question has to be velocity of the factory stuff - super or sub?

You will really need to reload to get the best results from all this work being planned. I tend to dual track my projects so they all come together at the same time these days.

Saves a lot of time waiting for the postman to turn up.
User avatar
Fudmottin
Silent But Deadly
Posts: 1166
Joined: Sat Jan 31, 2009 5:36 pm

Post by Fudmottin »

The nominal velocity of 380 ACP is about 955fps for 90gr projectiles. There are some hot loads out there that will break the sound barrier. But they are pretty hot and I don't want to shoot them from a PP style platform. It's not an enjoyable experience.

I'm going to do a bit of a redesign on the box. Having a single side plate to enclose the machined block is structurally iffy at best. Using three sides of a rectangular tube should work much better. In fact, I can put grooves in the tube portion with ridges in the block to fit. Also the top and bottom of the block can have a groove each with ridges on the tube. The tube would just slide in over the grooves and hopefully form a good seal as well as be captured. A single screw can hold the two pieces together.

The ridges in the chambers would double as turbulence generators.

If I can't make a good seal, there is always liquid gasket from an auto parts store. I'm not a fan of goop though. Minor gas leakage is only a problem if it can be heard over the breach pop.

Aluminum rectangular tubing all seems to be 6063. It's a bit softer than I would like, but it doesn't look too difficult to temper. I don't think I can do a hard coat anodize. But I should be able to do a regular anodize and use a protective clear coat.

For the block, I've chosen 7075. It's a bit more expensive than the 6061. But I like that it is harder to begin with. That should cut down on erosion. It's also got good corrosion resistance. I think 6061 is popular because it is about as cheap as aluminum gets.

The can will basically be just two pieces of aluminum. I will do a steel insert for threading to the muzzle (1144 steel) and tap a hole for a screw to hold the three sided tube section in place.

What I need to figure out is how to hold the steel insert in place. I already know that I want to use flanges like you see on hose connectors. The question is how large to make those flanges so that I don't exceed the elastic modulus of the aluminum. I want them to grip, not crush. With a spot of JB Weld, that should be a permanent attachment. When I install the thread insert, I will time the threads.

I need to get a small tap and die set.
45_fan
Senior Silent Operator
Posts: 118
Joined: Sat Dec 27, 2008 11:57 pm

Post by 45_fan »

I figure you can either externally thread your insert and use some thread locking compound (or a set screw even if you wanted cheap and easy on the timing), or knurl the outside of your insert and press it in. If you press it, throw the insert in the freezer and put your block in an oven at about 250. If you are quick about it, a bench vise or a hammer and a 2x4 might be all you need. When pressing, you could mark TDC on both the insert and block before pressing...
User avatar
Fudmottin
Silent But Deadly
Posts: 1166
Joined: Sat Jan 31, 2009 5:36 pm

Post by Fudmottin »

How about using a 12 ton press?
User avatar
Capt. Link.
Silent But Deadly
Posts: 2829
Joined: Wed Oct 17, 2007 9:05 pm
Location: USA.

Post by Capt. Link. »

If you use your rotary table to mill the baffle arcs you may also radius the sides by tilting the mill head to put a angle on it and using the table to follow the arc,if your head will not tilt step radius the sides and that will also add to the turbulence and make the devise quieter
Pat sot07
User avatar
Fudmottin
Silent But Deadly
Posts: 1166
Joined: Sat Jan 31, 2009 5:36 pm

Post by Fudmottin »

I'm not quite sure about what you are talking about. I would ask you to draw me a picture, but I still owe a picture of the arcs I want to mill as well as my upgraded method for making the two main pieces.

On a related note, are there milling tools that can do router type cuts in metal?

At the end of the day, even if I don't have the most advanced baffles, I would like the finished work to look professional.
User avatar
pneumagger
Silent But Deadly
Posts: 3455
Joined: Mon Jul 23, 2007 8:09 am
Location: N.E. Ohio

Post by pneumagger »

If you get a rotary table, just make a round tube with several of these.
They work well :wink:

Image
I reject your truths and substitute my own realities
User avatar
Fudmottin
Silent But Deadly
Posts: 1166
Joined: Sat Jan 31, 2009 5:36 pm

Post by Fudmottin »

LOL! The rotary table I linked to (twice) I've got. I should pull it out. But it looks like it gives me a theta axis that I can add to the mini-mill I picked out.

Got the end mills, clamps, dial gauges, and micrometers today. *happy dance*

Two reasons why I'm playing with the box design:

1) Easy to mount so it doesn't block the gun's sights.
2) More volume than a tube of the same length and width.

Obviously it will be heavier for a given volume because of simple geometry. But the thread about the Black Box and that other box shaped suppressor kind of got my imagination turning.

Nice K baffles you got there. Did you draw those?
User avatar
pneumagger
Silent But Deadly
Posts: 3455
Joined: Mon Jul 23, 2007 8:09 am
Location: N.E. Ohio

Post by pneumagger »

Fudmottin wrote: Nice K baffles you got there. Did you draw those?
I did the drawing... but those are Element baffles.
I reject your truths and substitute my own realities
User avatar
Fudmottin
Silent But Deadly
Posts: 1166
Joined: Sat Jan 31, 2009 5:36 pm

Post by Fudmottin »

I see. Well still a good job on the drawing. Try that in POV-Ray. You have to describe all the shapes in TEXT unless you get Moray or something. :twisted:

For me, a large part of the fun of doing an F1 can is also doing my own design. I know that's not a sure fire route to the quietest can. But for the two designs I am working on, it is almost the only option.

For my 300-221 (300 Whisper), I want a reflex that goes under the hand guard with just a small amount of clearance. The only important detail I've been waffling on is the baffles.

For the PPK/S can, the challenge is a bit different. It is also rather interesting to me. And that is to create a can that is hearing safe and doesn't create much, if any, additional breach pop. If I can make it really quiet, so much the better.

Going with a slab style design just makes things more interesting.

It's an intellectual challenge that goes beyond the simple expedient of making a can for less money than buying a commercial can on a Form 4.

The only thing spoiling the fun here is doing the Form 1 paperwork and paying $400 (two cans) for the privilege of making what is really just a firearms accessory, not an actual firearm.

You don't even need to file with the BATFE when you make your own Title I firearm from scratch. The law is so logical.
Post Reply