Silenced Sterling L34A1
Posted: Fri Jul 06, 2007 9:54 am
I posted this last week, but after the site went down, the post seems to have dissapeared so I'll do it again.
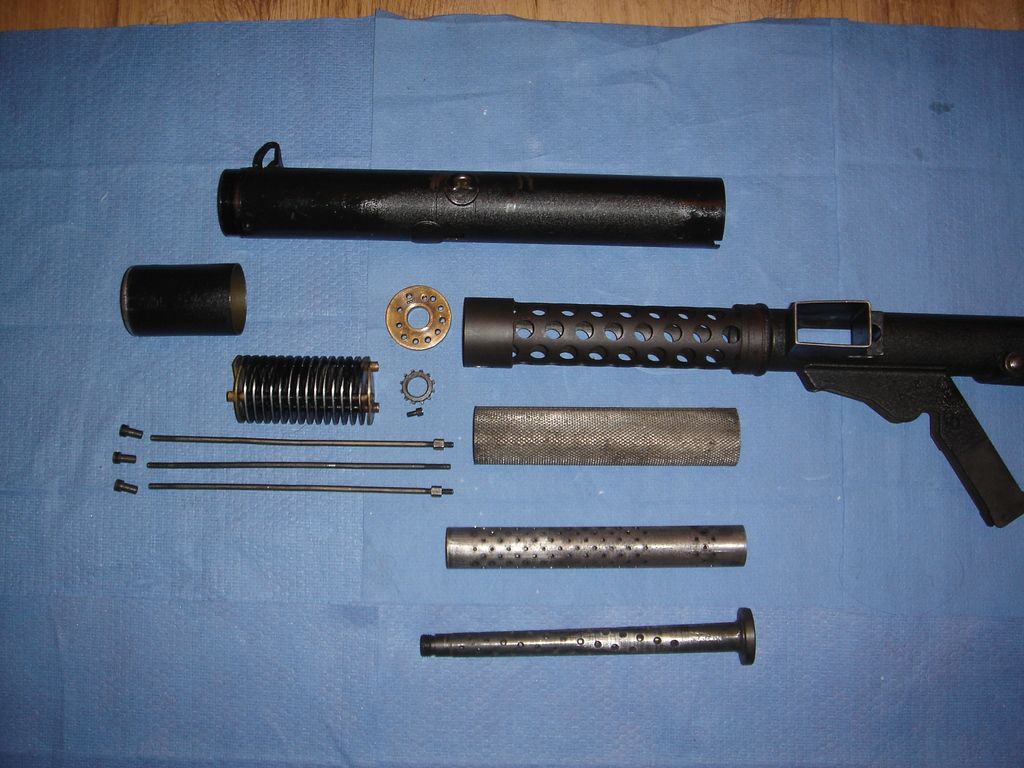
I saw a lot of talk about the spiral internals of the Sterling silencer, but no-one had any photos of it, so I brought one home from work and stripped it down to see what it was like.
Hopefully all the photos you'll ever need are here:
The holes in the barrel coincide with the low sections of the rifling.

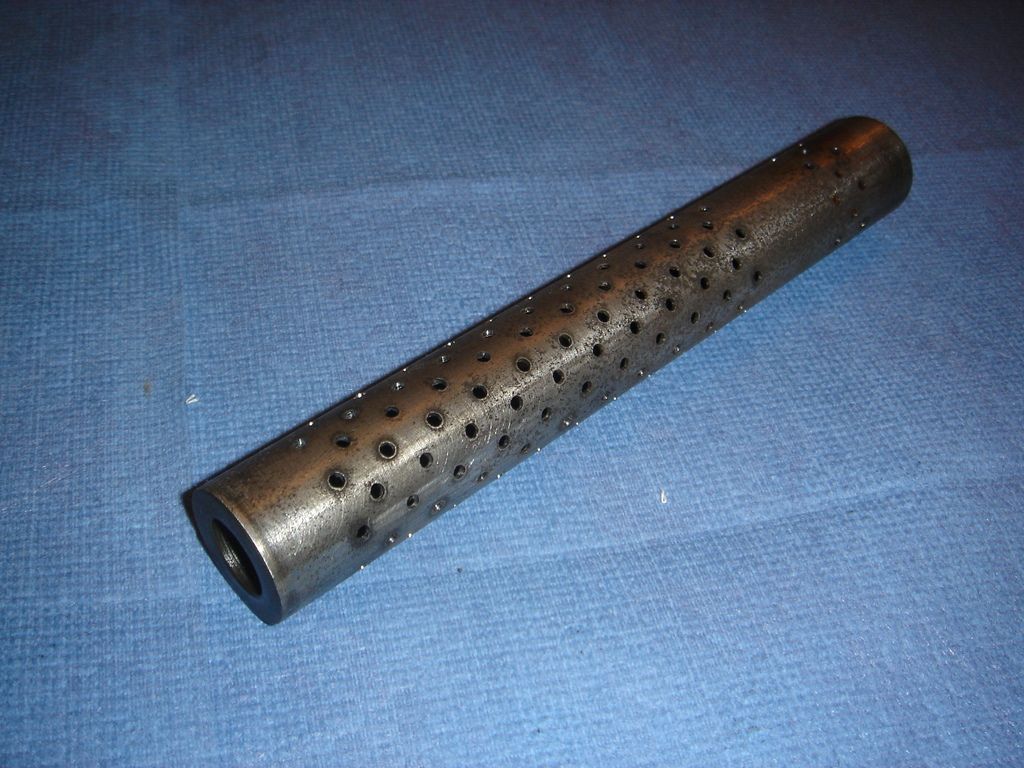
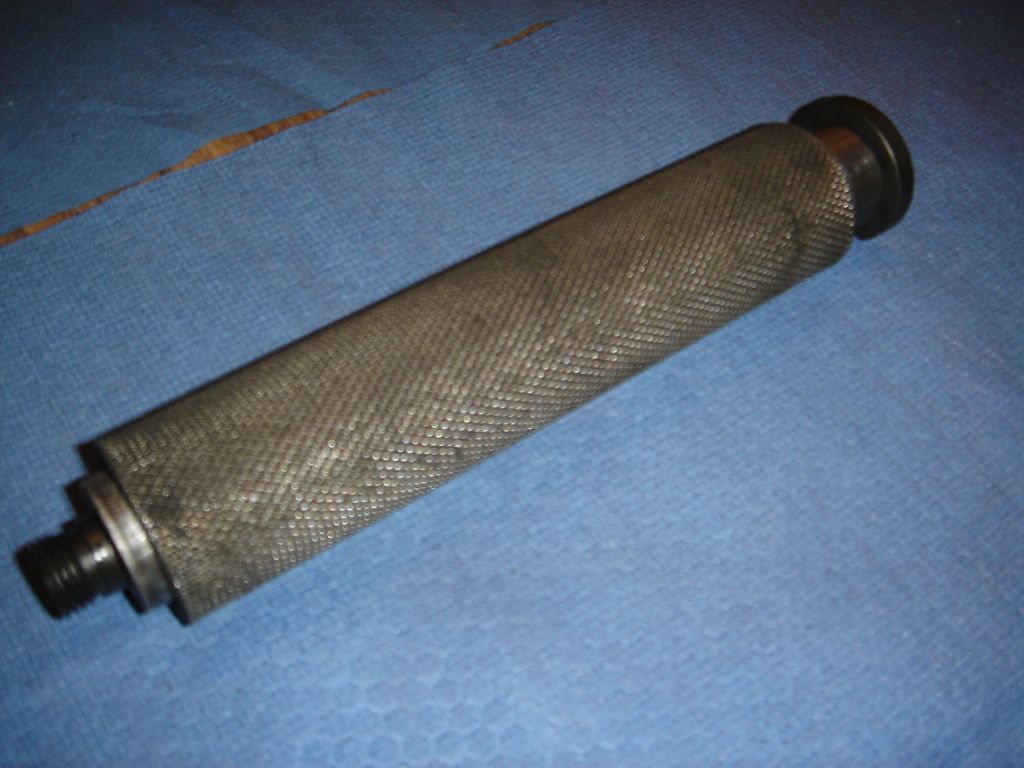
This is a thinwalled metal tube with an integral cap at one end.
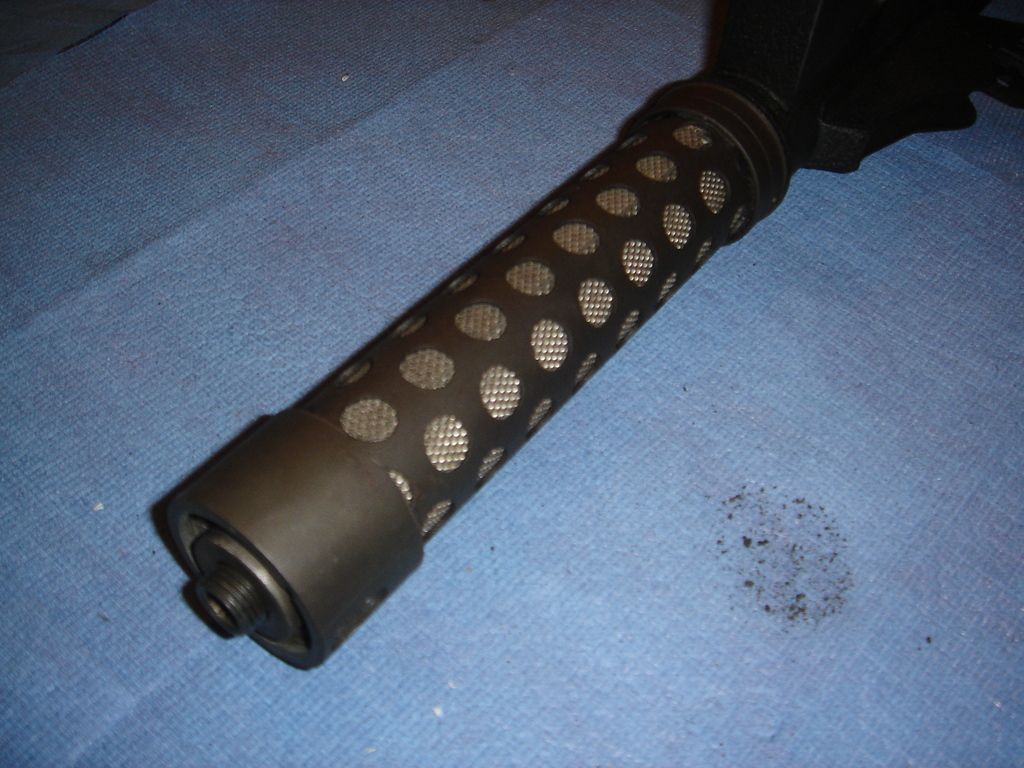
This is like a roll of cheese grater material.
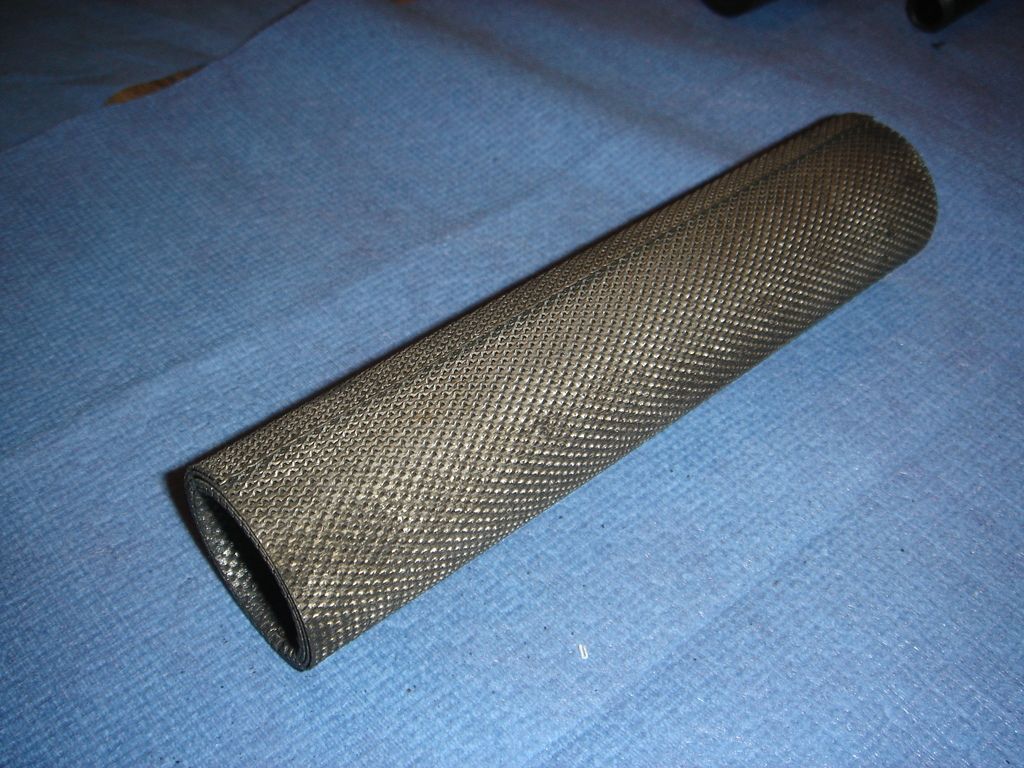
The cheese grater material is put over the thinwalled metal tube.
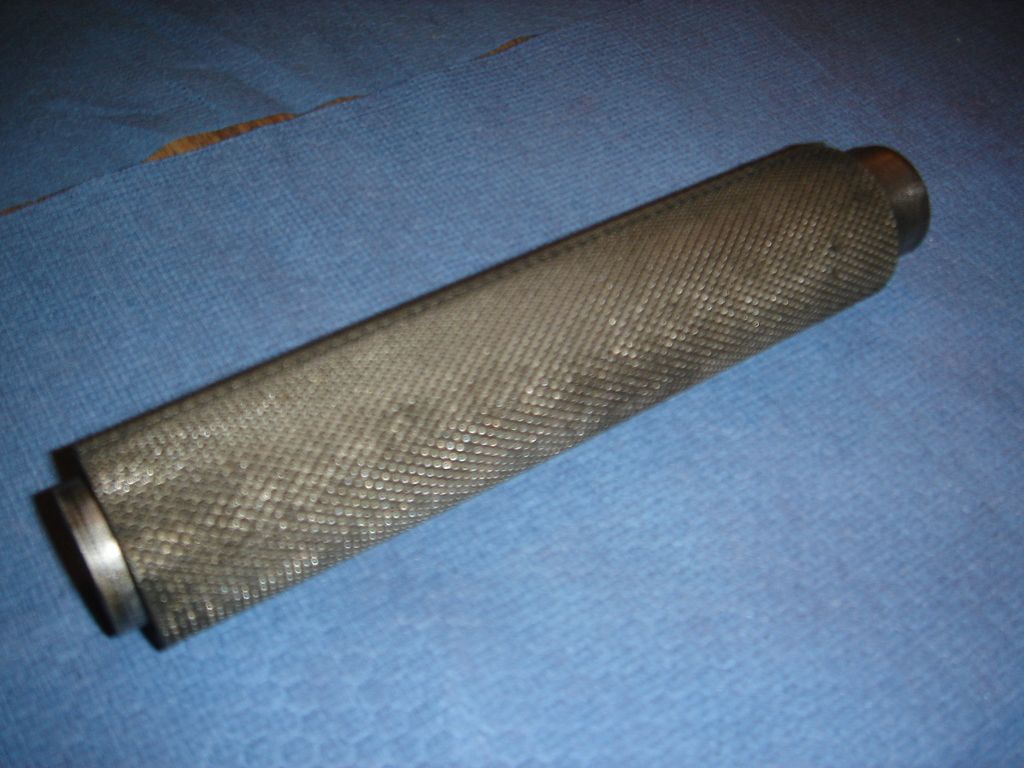
The barrel is inserted into the thin tube.
The assembly is put into the receiver. (the barrel actually has to go into the receiver from the rear of the gun)
Sliding the assembly into the receiver is a very snug fit.
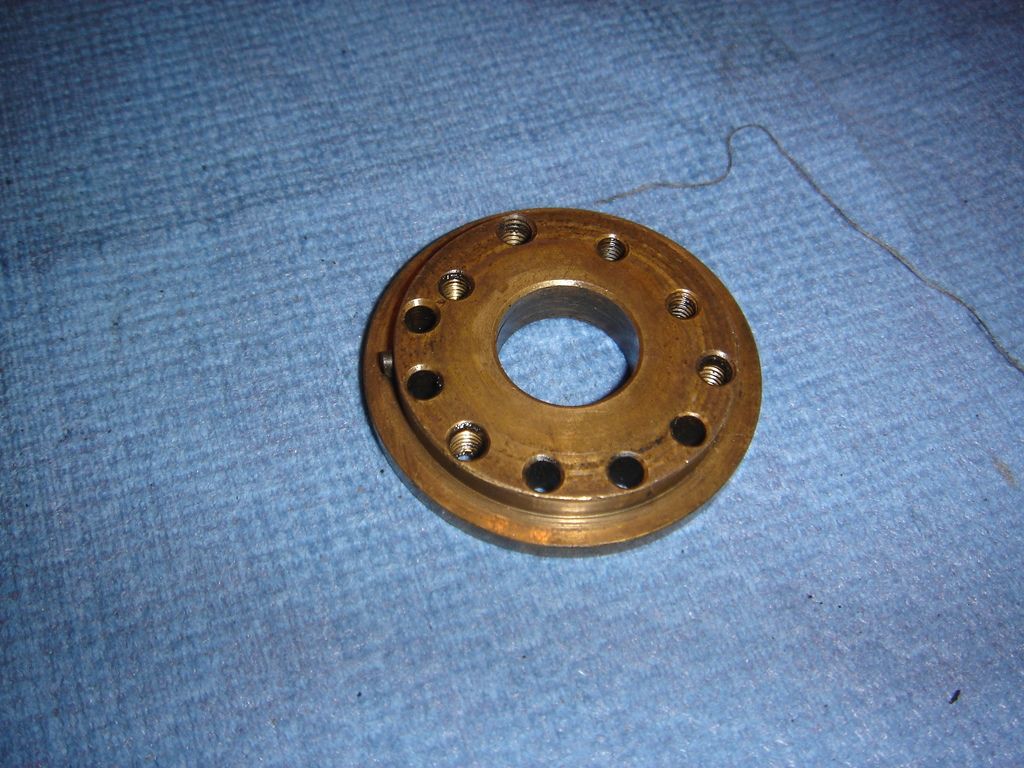
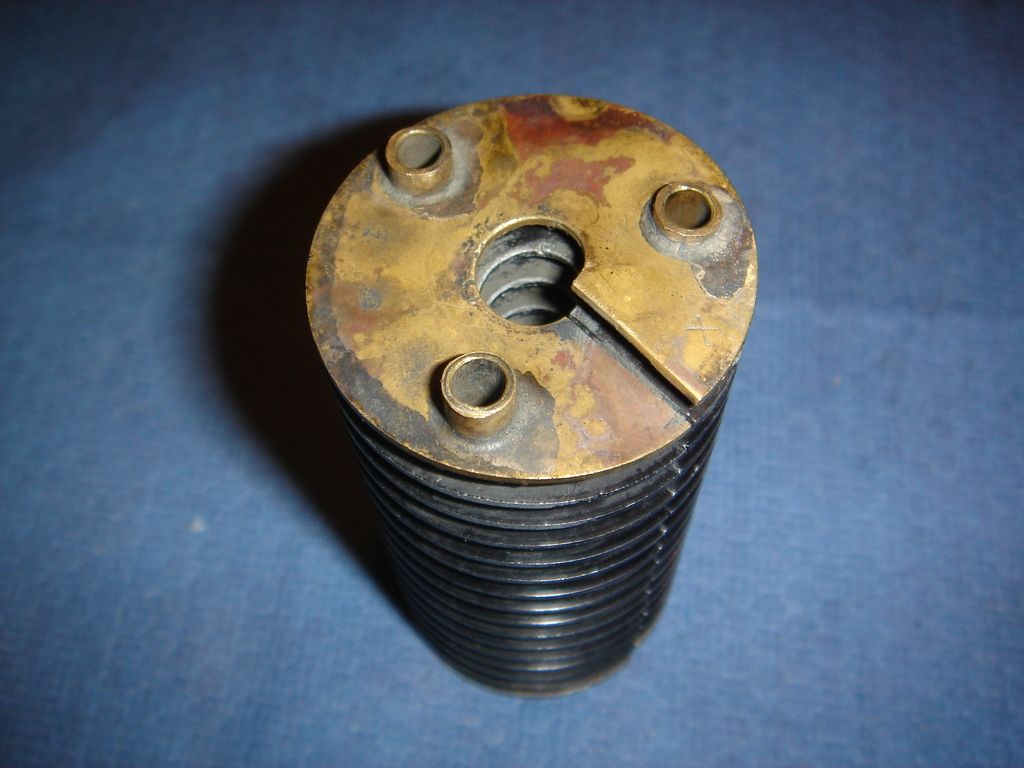
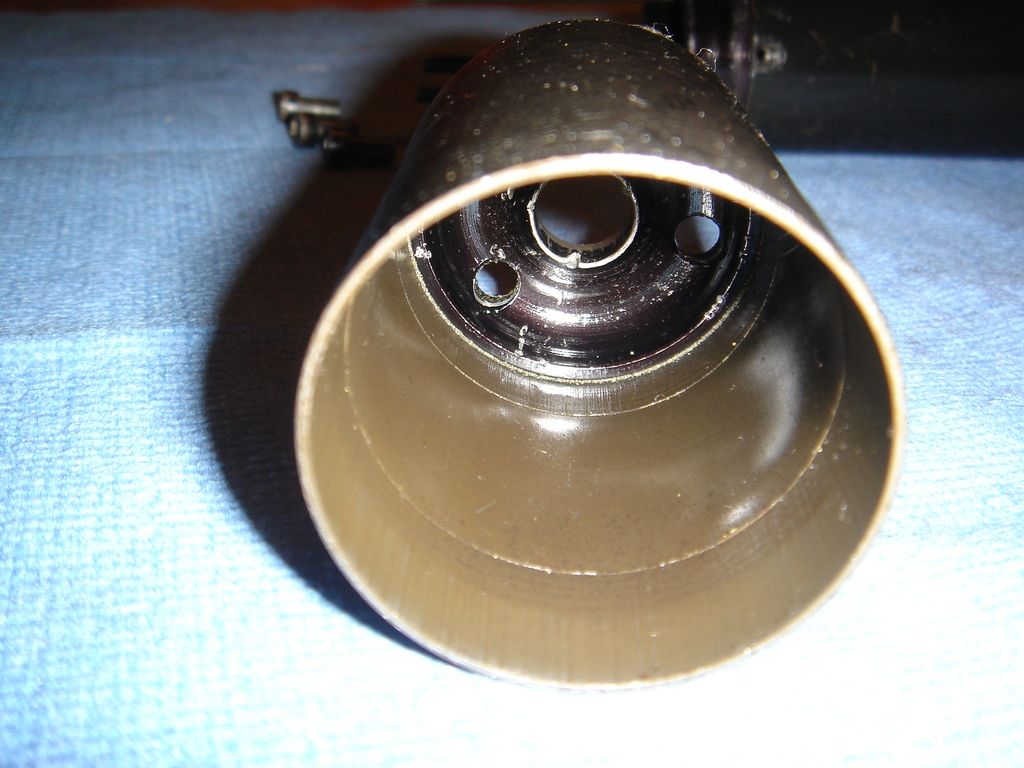
This brass disc slides over the end. Note the locating lug on the left hand side.
This nut is tightened down onto the barrel to stop the barel sliding out of rear of the receiver and the assembly coming out the front of the receiver.
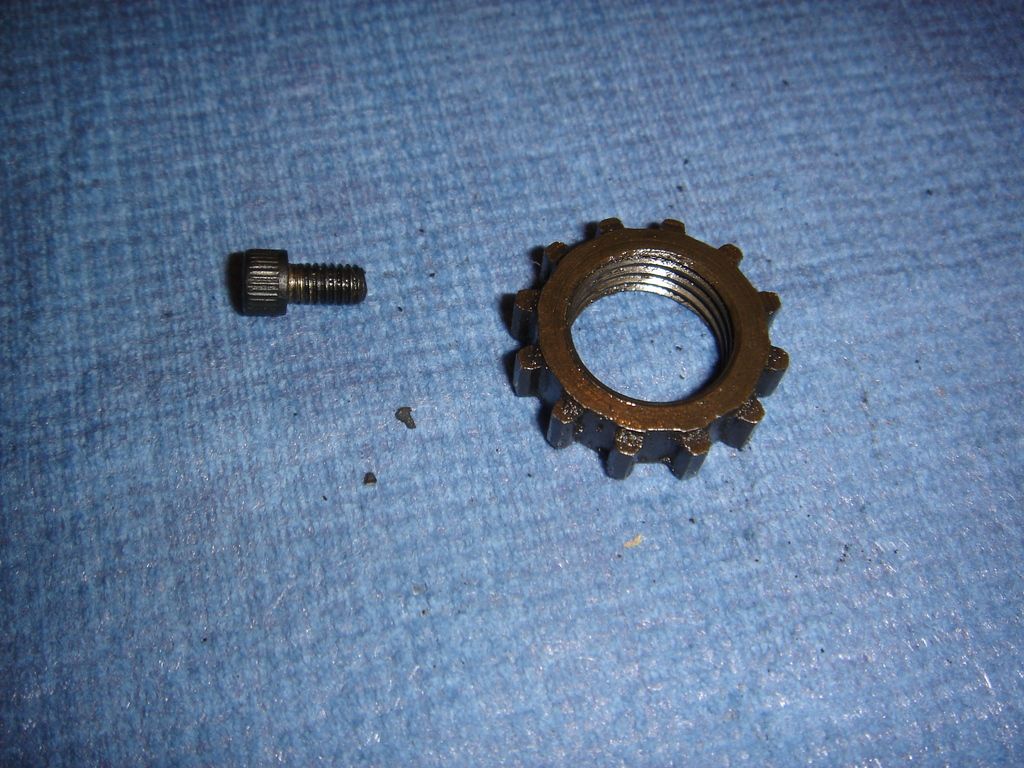
The screw acts as a locking tab for the nut. I assume a special tool is available, but I had to 'improvise'.
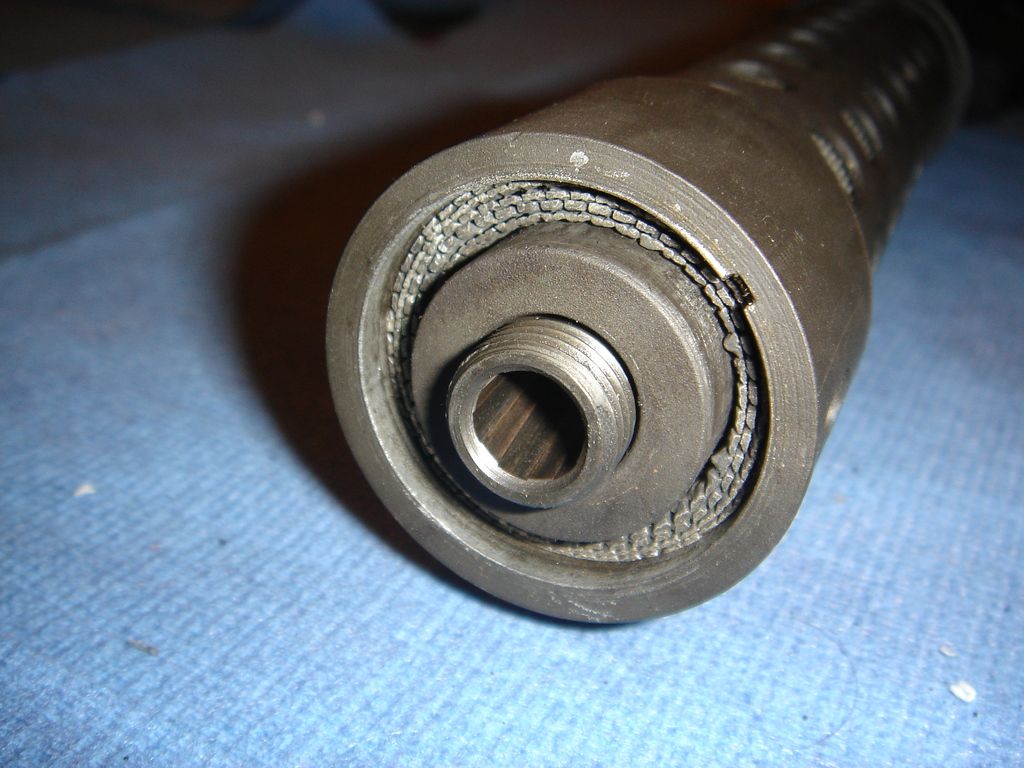
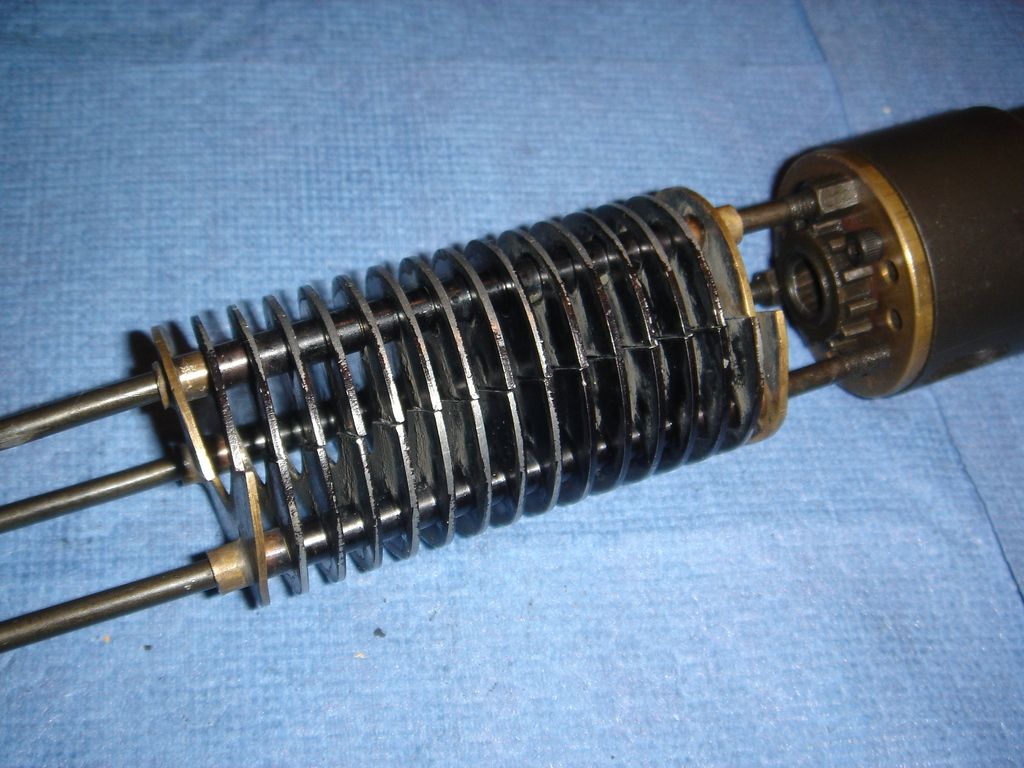
This is the spiral. It is made of lots of pressed sheets of metal that all slide onto 3 tubes. They look like they have been silver soldered onto the shaft.
The end spirals are a different material to the rest of the spirals.
You can see the joins in the discs here. You can see that the spiral on the far left is bent slightly, probably as this is the first baffle.
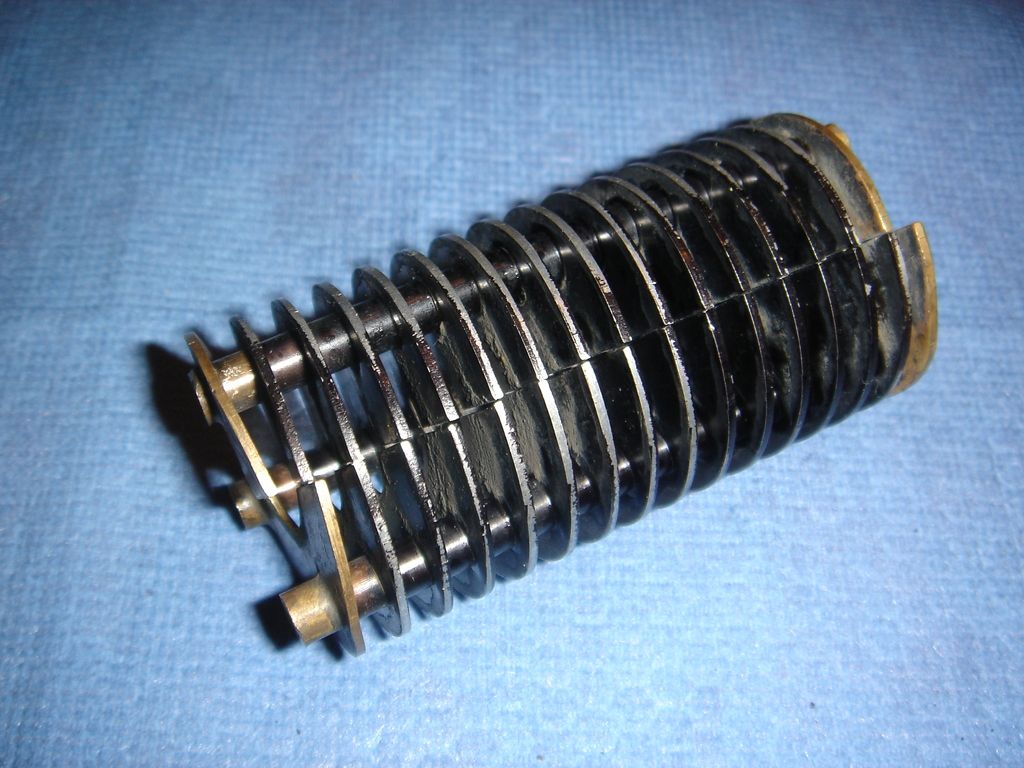
The spiral slides onto the 3 steel rods that screw into the brass disc.
Only the 2 of the rods(lower ones) have locking nuts on them(no idea why)
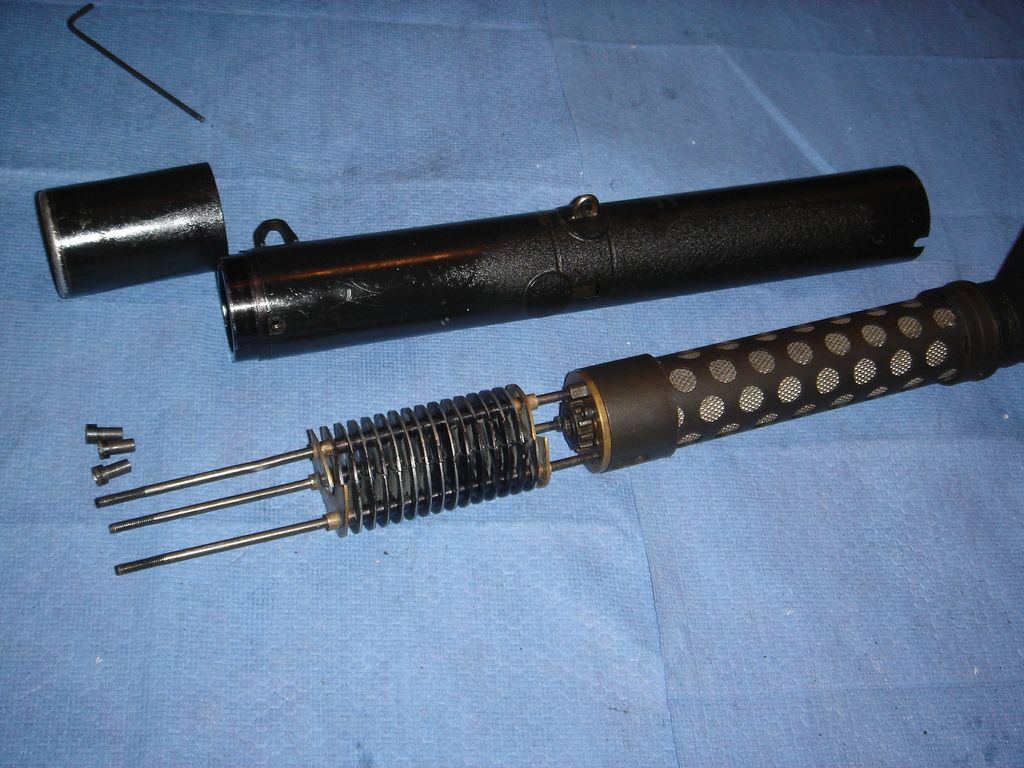
The spiral is free floating on the steel rods.
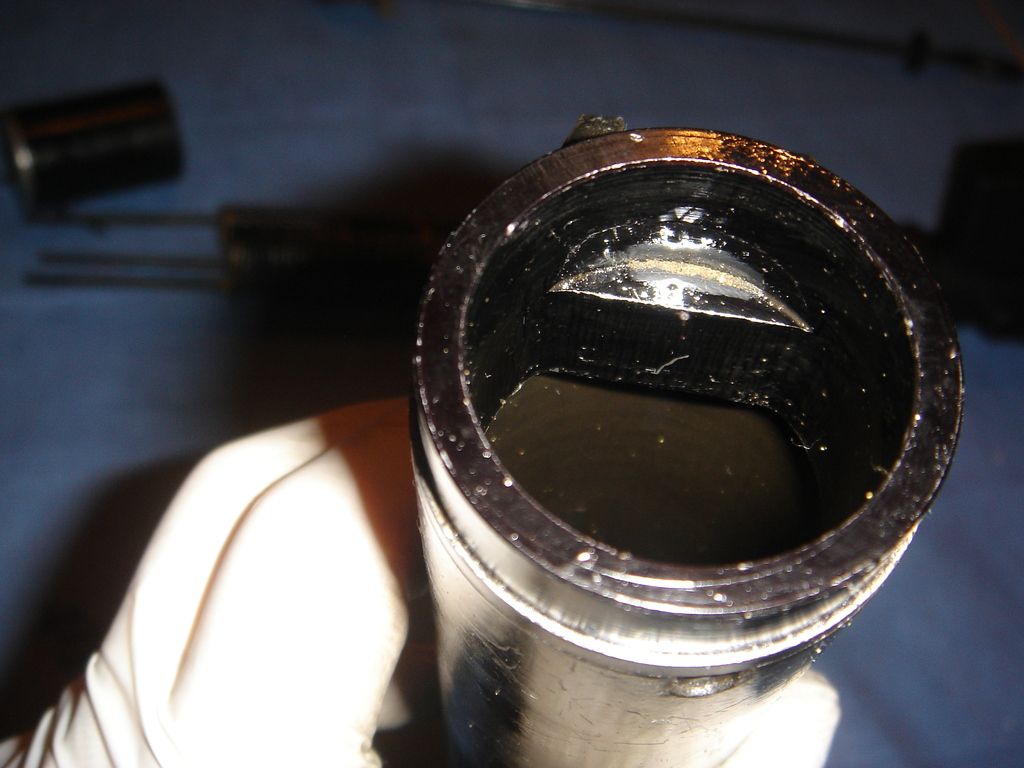
The main body is a basic tube with the only obstruction on the inside caused by the recess made for the front sight.
It is this obstruction that stops the spiral travelling any further forward.
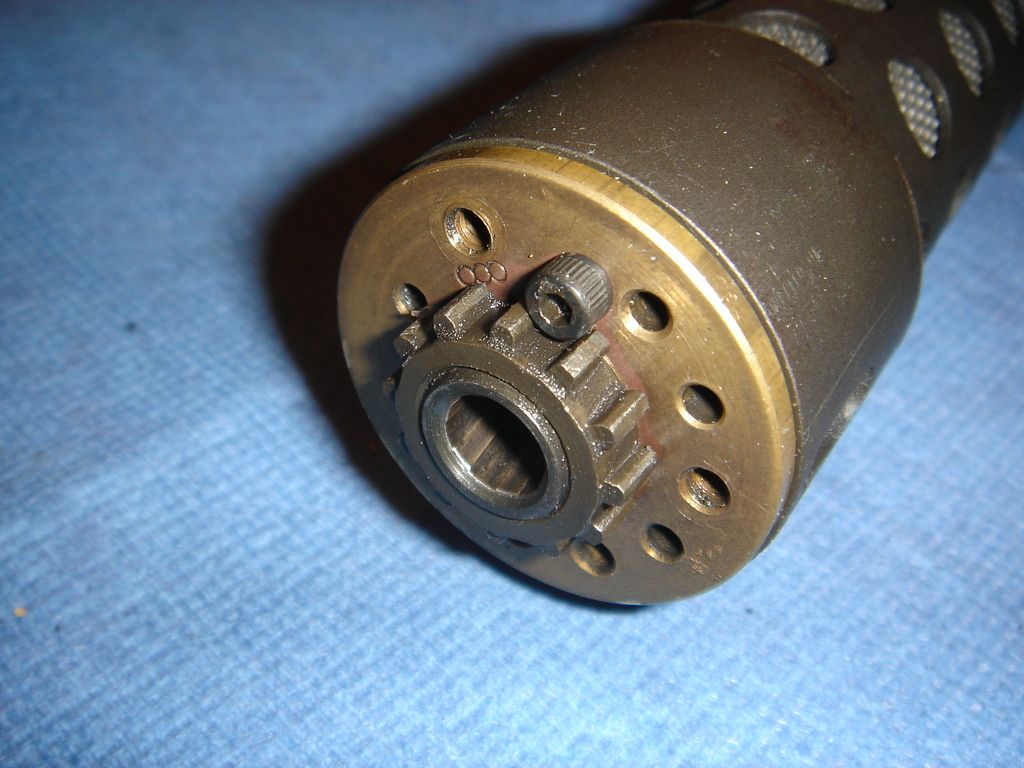
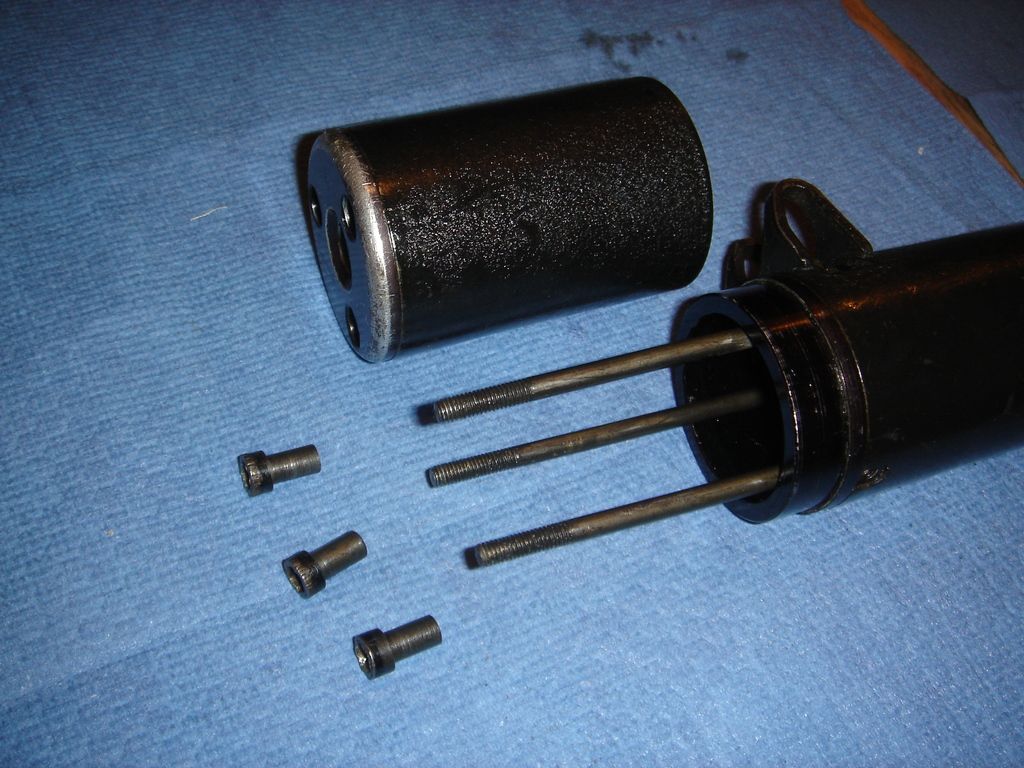
The main body has 2 screw that hold it on although these are mainly for orientation. One is at the front and has a hole in the body, the other is at the rear and is a groove in slot at the end(this can be seen a few pics above)
Once the end cap goes on, the 3 allan bolt(threaded on the inside) hold it on. I have been told that these are torqued, but have no idea what to.
The exit hole of the endcap has got a burr on it, but I don't think this is from a strike as it is burred towards the inside. The profile of the exit hole is such that if you had the correct sized doughnut, it would fit inside the endcap perfectly.
I shot this smg before it was cleaned up, and there was a lot of smoke, assumably from a build up of oil/grease from previous people cleaning it. The smoke cut down after a while. No hearing protection was needed, although a true sound level isn't very represented in this video.
https://youtu.be/J063hqnhlBY
The gun is very accurate and there is no climb even on full auto.
I hope this is of use to someone.
I saw a lot of talk about the spiral internals of the Sterling silencer, but no-one had any photos of it, so I brought one home from work and stripped it down to see what it was like.
Hopefully all the photos you'll ever need are here:

The holes in the barrel coincide with the low sections of the rifling.

This is a thinwalled metal tube with an integral cap at one end.

This is like a roll of cheese grater material.

The cheese grater material is put over the thinwalled metal tube.

The barrel is inserted into the thin tube.

The assembly is put into the receiver. (the barrel actually has to go into the receiver from the rear of the gun)

Sliding the assembly into the receiver is a very snug fit.

This brass disc slides over the end. Note the locating lug on the left hand side.

This nut is tightened down onto the barrel to stop the barel sliding out of rear of the receiver and the assembly coming out the front of the receiver.

The screw acts as a locking tab for the nut. I assume a special tool is available, but I had to 'improvise'.

This is the spiral. It is made of lots of pressed sheets of metal that all slide onto 3 tubes. They look like they have been silver soldered onto the shaft.
The end spirals are a different material to the rest of the spirals.

You can see the joins in the discs here. You can see that the spiral on the far left is bent slightly, probably as this is the first baffle.

The spiral slides onto the 3 steel rods that screw into the brass disc.
Only the 2 of the rods(lower ones) have locking nuts on them(no idea why)

The spiral is free floating on the steel rods.

The main body is a basic tube with the only obstruction on the inside caused by the recess made for the front sight.
It is this obstruction that stops the spiral travelling any further forward.
The main body has 2 screw that hold it on although these are mainly for orientation. One is at the front and has a hole in the body, the other is at the rear and is a groove in slot at the end(this can be seen a few pics above)

Once the end cap goes on, the 3 allan bolt(threaded on the inside) hold it on. I have been told that these are torqued, but have no idea what to.

The exit hole of the endcap has got a burr on it, but I don't think this is from a strike as it is burred towards the inside. The profile of the exit hole is such that if you had the correct sized doughnut, it would fit inside the endcap perfectly.

I shot this smg before it was cleaned up, and there was a lot of smoke, assumably from a build up of oil/grease from previous people cleaning it. The smoke cut down after a while. No hearing protection was needed, although a true sound level isn't very represented in this video.
https://youtu.be/J063hqnhlBY
The gun is very accurate and there is no climb even on full auto.
I hope this is of use to someone.