Project "Silent 22-45" Part 2

Yes, it can be legal to make a silencer. For everything Form-1, from silencer designs that are easily made, to filing forms with the BATF, to 3D modeling. Remember, you must have an approved BATF Form-1 to make a silencer. All NFA laws apply.

Moderators: mpallett, bakerjw

Post Reply
User avatar
L1A1Rocker
Silent But Deadly
Posts: 3578
Joined: Wed Feb 21, 2007 5:40 pm
Location: Texas Hill Country

Project "Silent 22-45" Part 2

Post by L1A1Rocker »

OK, obligatory disclaimer here: DO NOT start a suppressor project without FIRST obtaining your approved Form 1 in hand, PLUS any state paperwork that may be necessary in your state.

First let me apologize for not posting this sooner. My grandmother has been in very poor health the last month and has finally past this last week on Mother’s day. I had planned on posting this last week but that had to take a back seat. Now, on to the good stuff.

This was my first foray into turning stainless steel and I was very surprised at how well the stainless bar stock took to machining. The little splinters were not pleasant at all but the material was very “workable”.


Before I could start turning out parts that had threads on them I had to make myself a set of thread checking gauges. I once checked into having custom taps and dies made up and just about dropped the phone at hearing the price. I learned how to make my own custom threads on the lathe. So here is the process I undertook to make a set of check gauges that I will make my other threads to match.

First thing was to face off the end of the stainless steel bar stock

Image

Image

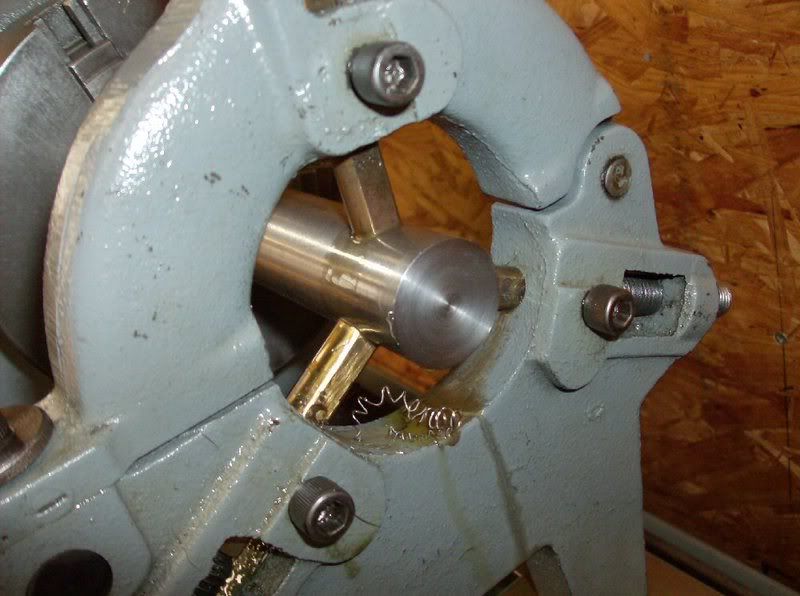
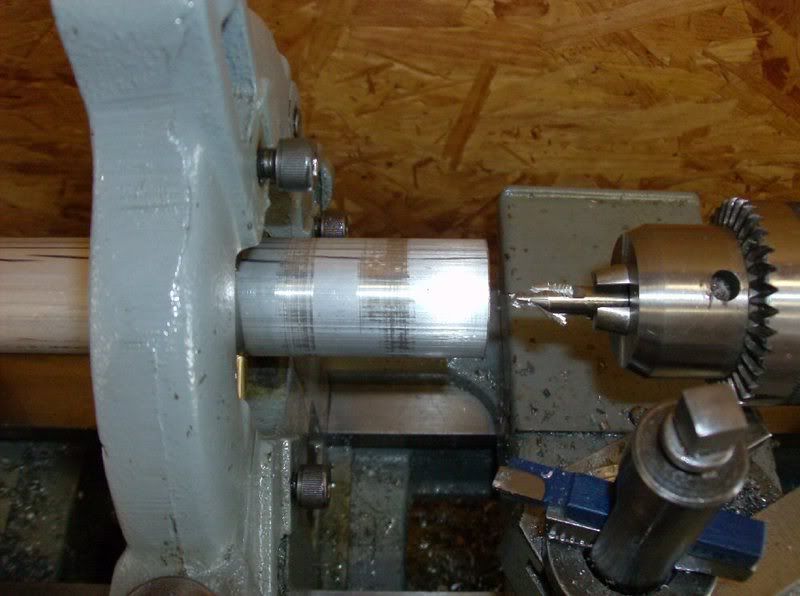
Next was to put my center hole in place for the live center

Image

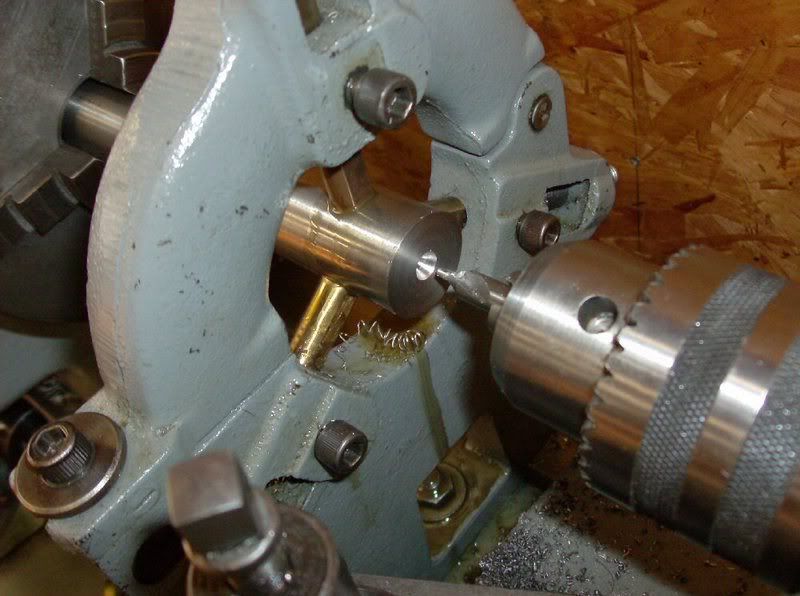
Now it’s set up to do some trimming down.

Image

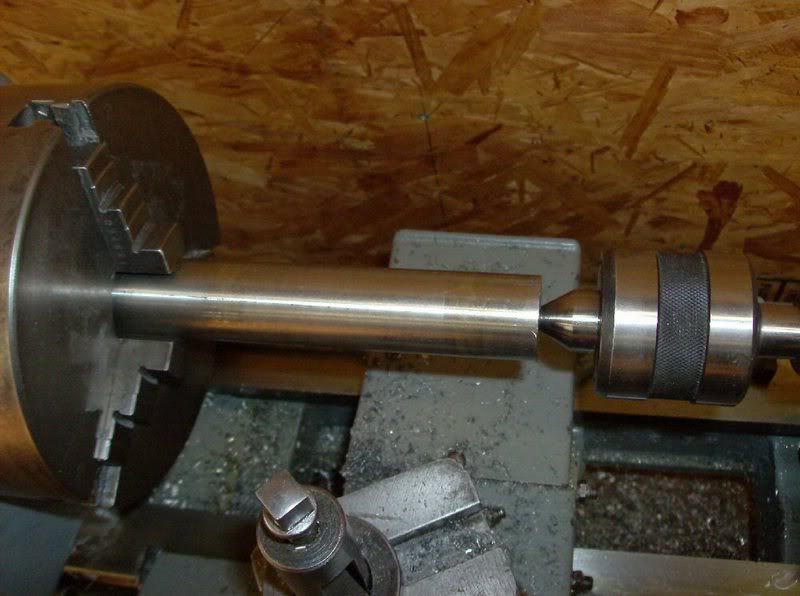
Here is a little Vid of turning down the bar stock. Please forgive the unedited videos. I’m in a hurry to get this posted before heading out of town.

http://s79.photobucket.com/albums/j154/ ... rstock.mp4


Now it’s threading time. I’ve been a little remise in posting pics of the threading process so here are lots of pics and some vids thrown in for good measure.

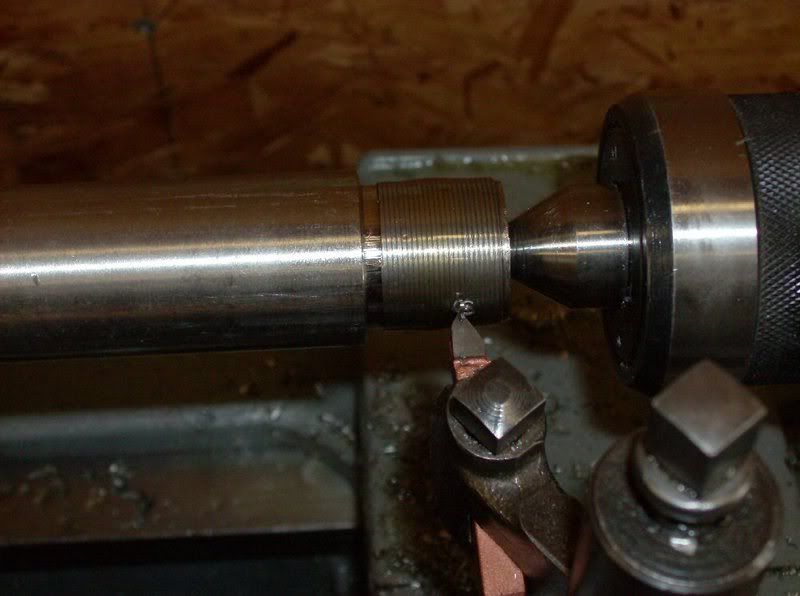
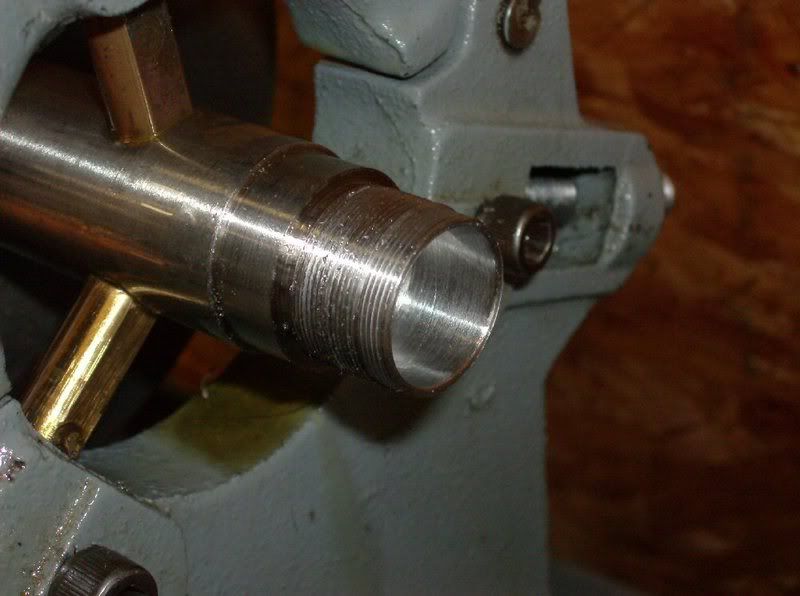
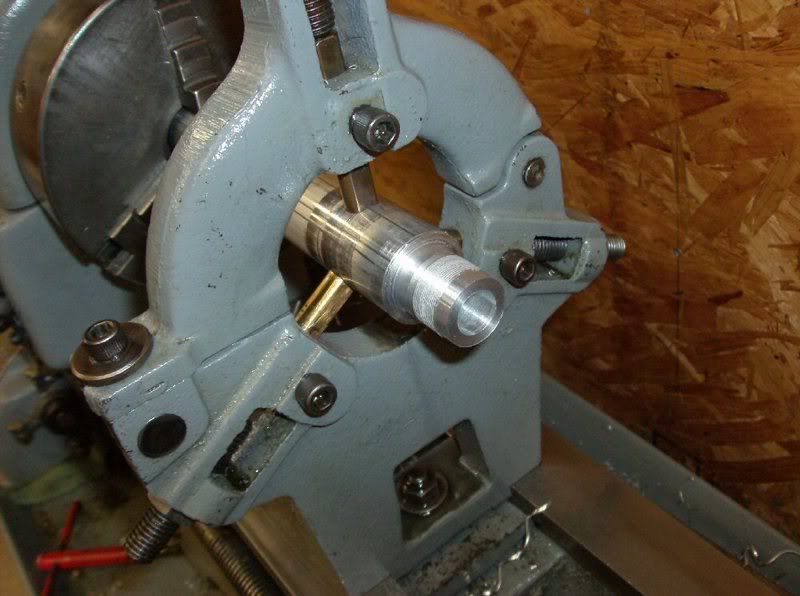
First was to turn down the bar stock to the correct O.D. and cut thread relief on each side of where the threads will be.

Image

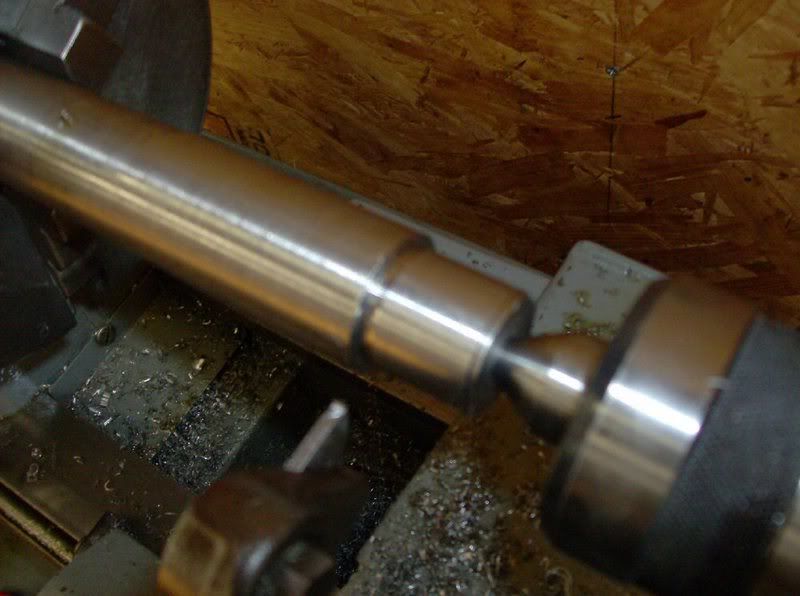
And now we can start cutting threads.

Image

Image

Here are some vids of the threading process.

http://s79.photobucket.com/albums/j154/ ... rstcut.mp4

http://s79.photobucket.com/albums/j154/ ... ngVid1.mp4

http://s79.photobucket.com/albums/j154/ ... ngVid2.mp4

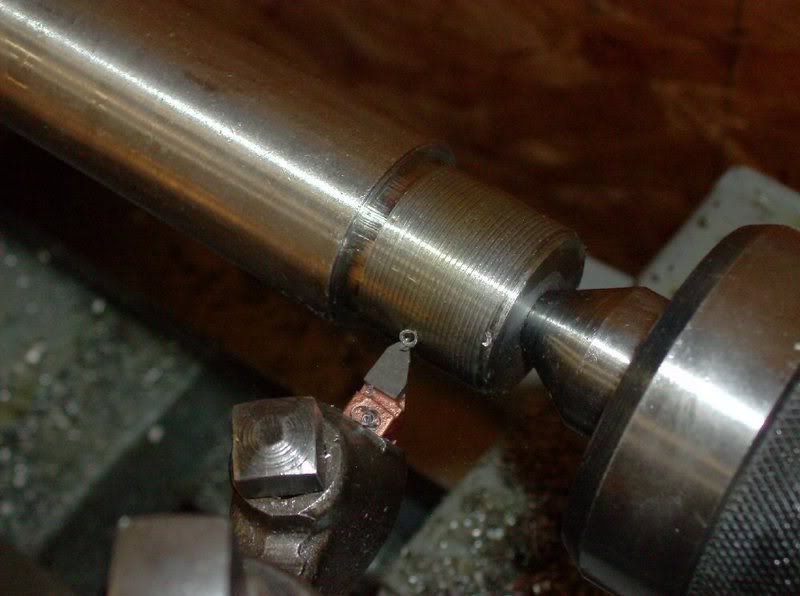
And with the threading complete.

Image

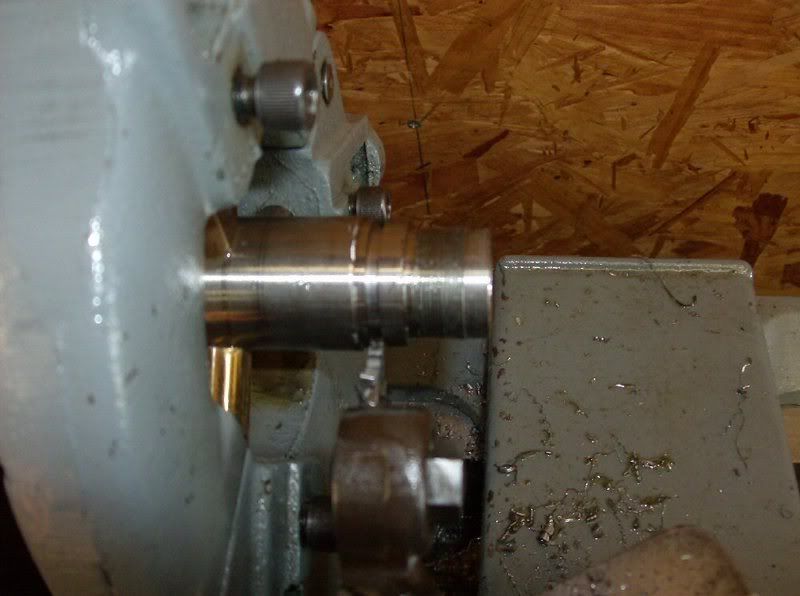
And now just for S & Gs, and because I’ve got the tool to do it. . .a little knurling treatment.

Image

And here are my thread check gauges. (sorry no pics of making the tube gauge) All my following threads will be made to these specs.

Image


Now, since I already had the Stainless in the lathe I decided to turn out the end cap.
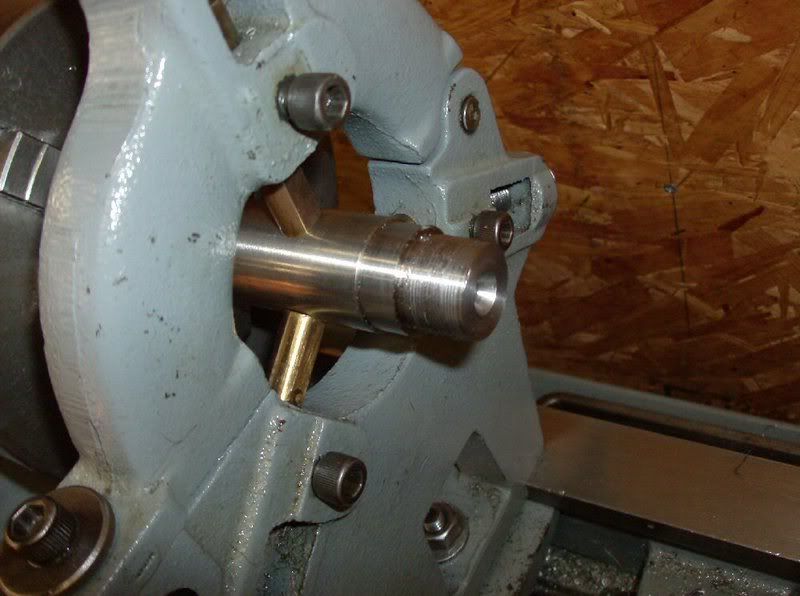
First I drilled/bored a ¼ inch hole through the entire length of what is to be the end cap.

Image

OK, just being a little coy with the pics here but can you see the end cap in the bar stock?

Image

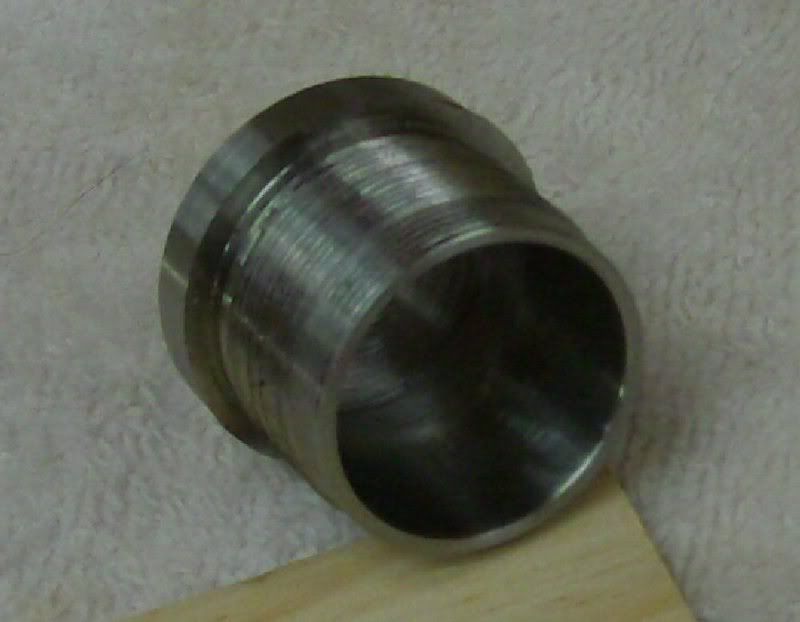
Here is the cap just before threading.
Image

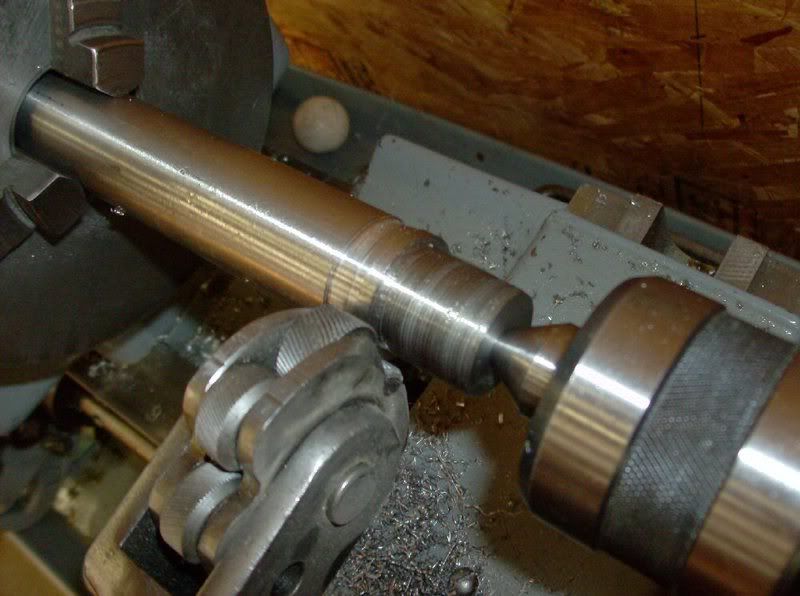
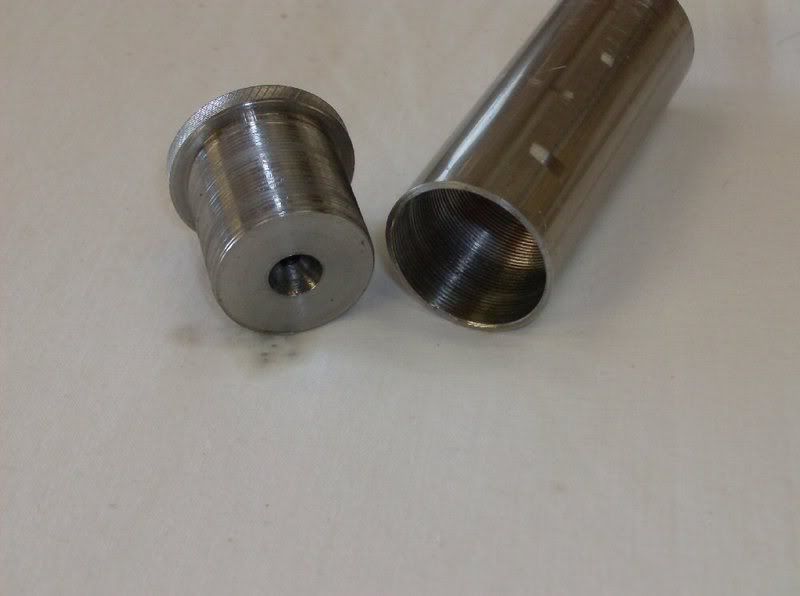
Here it is after threading and boring.

Image

And now it’s time to cut it off from the bar stock.

Image

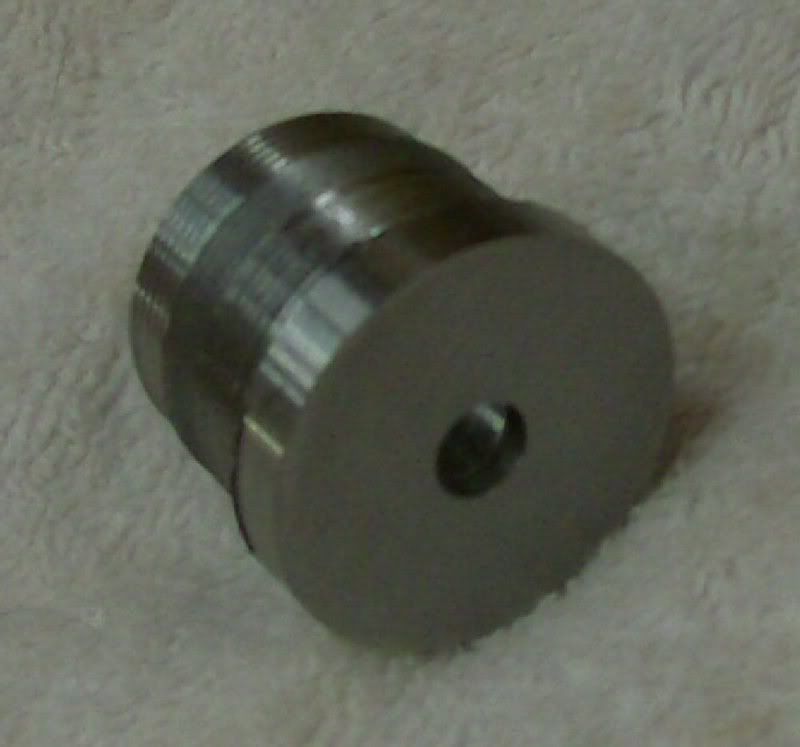
And now a couple pics of the completed end cap.

Image

Image
Just a note for all us other hobbyists out there. Be sure to keep you tool bits sharp.

Image


NEXT: A change of stock to aluminum and we’ll turn out the chamber support. This is the part that will be screwed down onto the threads on the barrel right near the chamber. The stainless tube will then be screwed down completely over this and butt up against the receiver. To keep this from unscrewing at the wrong time and in the wrong place it will be affixed to the barrel using a set screw.

OK, here we go again, center hole the bar stock for the live center.

Image

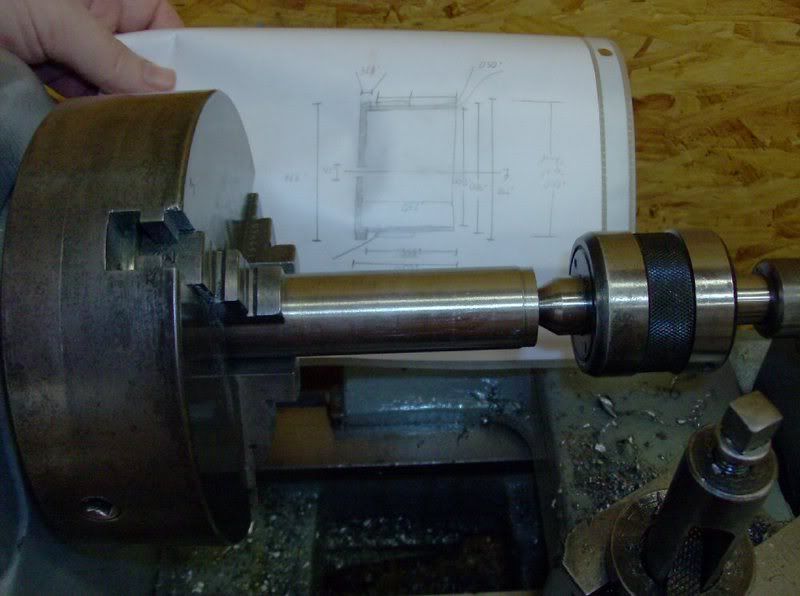
I’m going to skip a lot of what you’ve already seen in this post on this peace so here is a pic with the chamber support turned down and the outside threaded for the tube. The inside diameter is already drilled out for the next step.

Image

And here is the next step. Threading the inside. Now I don’t want to disappoint anyone by not lathe turning these threads but I’m basically a lazy person and will take any shortcut I can.

Image

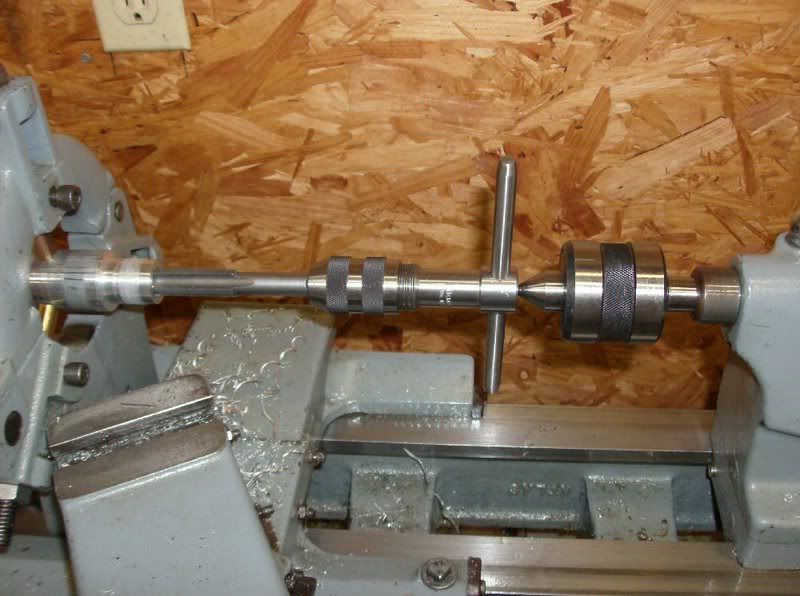
That is really a great little setup. The tap holder has a center hole machined into the back of it to run your live center into. Pretty neat.

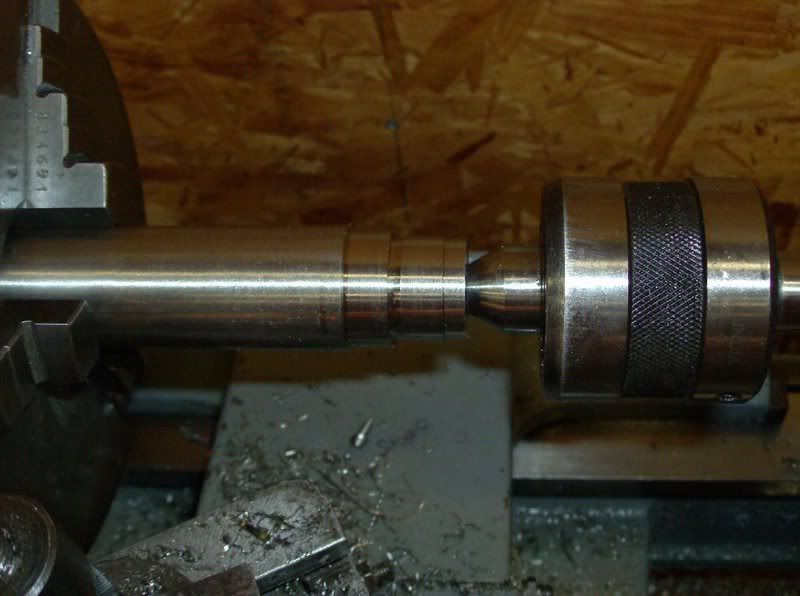
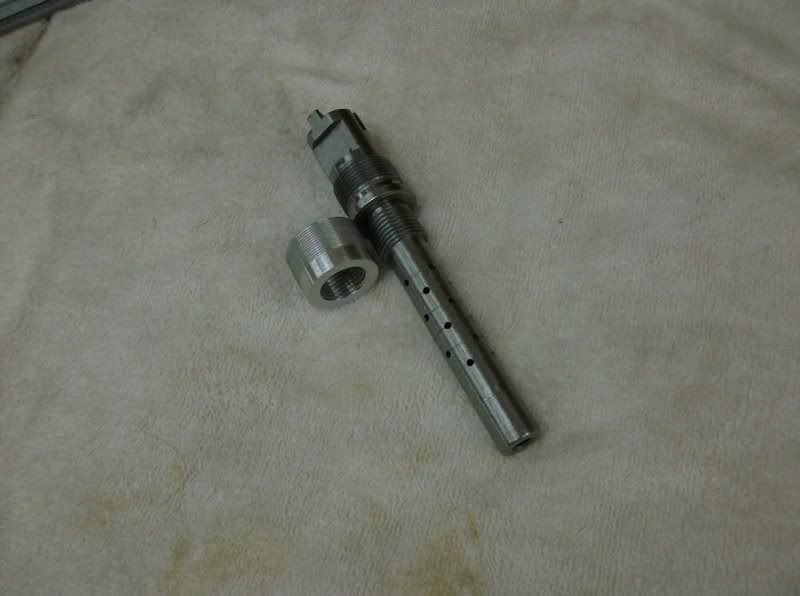
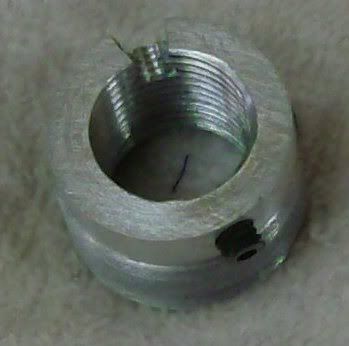
OK, here is the complete deal just before cutting it off.

Image

And here it is laying next to the barrel.

Image

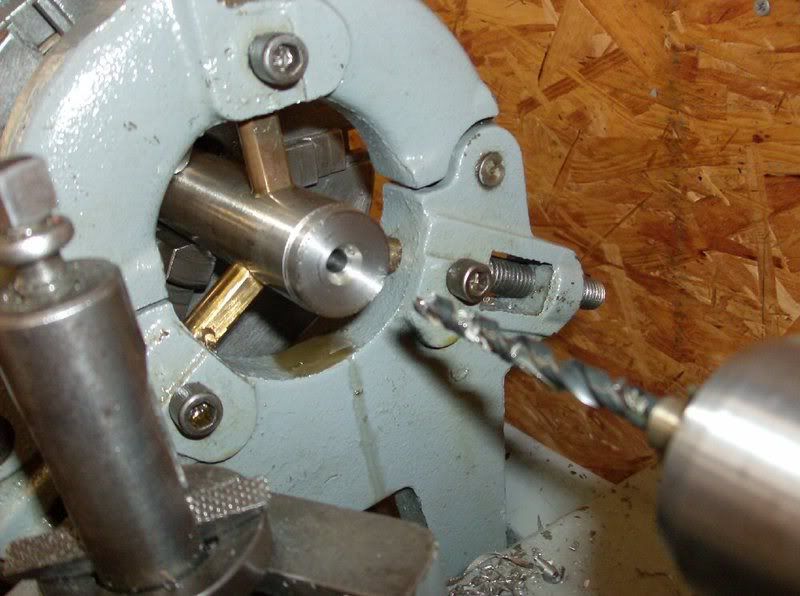
Now getting ready to tap it for the set screw.
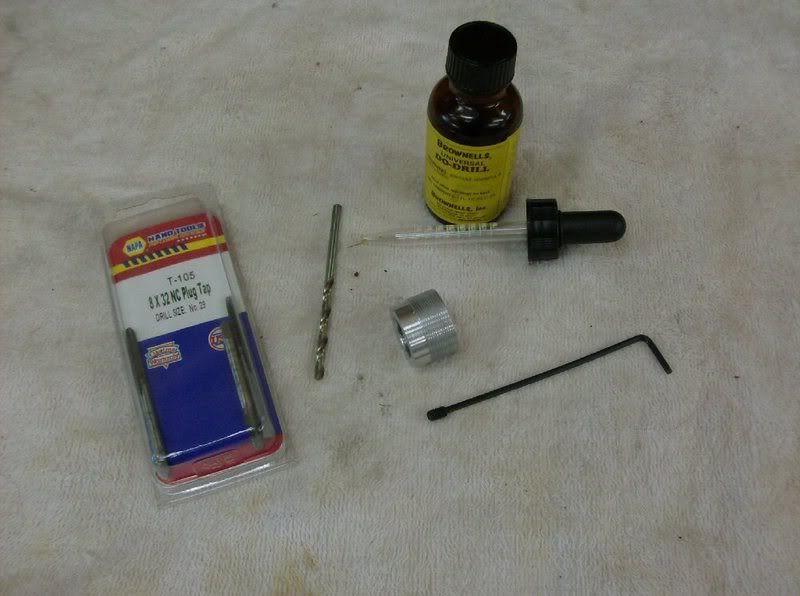
Image

Tapping

Image

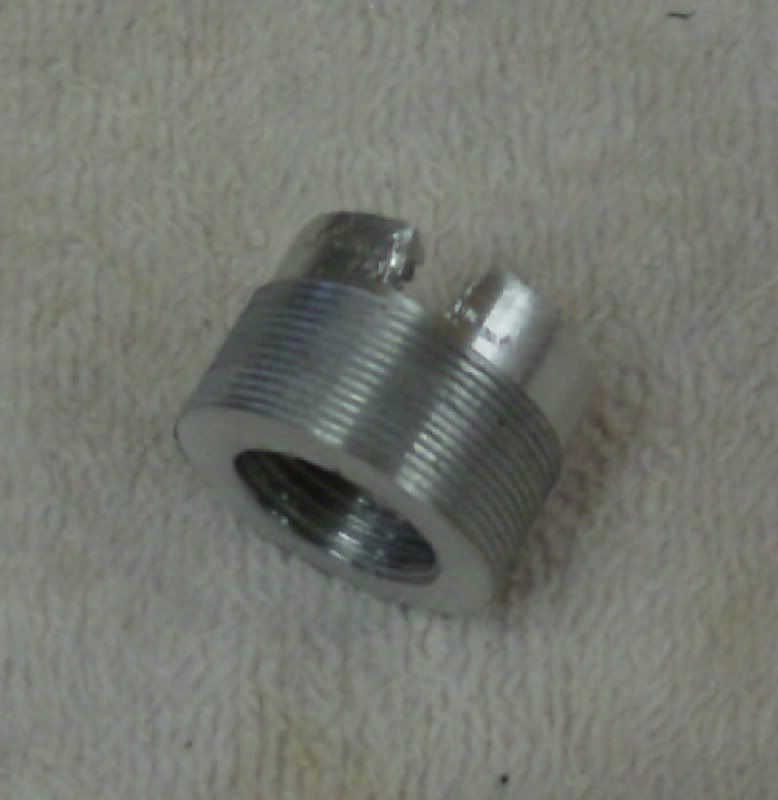
And now a major F-up on my part. In order to find my mark on where to place the hole on the barrel for the set screw I screwed down the chamber support onto the barrel. I then used an automatic punch down the set screw hole in the chamber support to mark my spot to drill. Now the chamber support WOULD NOT COME OFF THE BARREL!!! Yep, you guessed it! I had disrupted the threads on the barrel and I was SCREWED!!!

Out came the dremil tool with a mini end mill attached. I WAS able to salvage it but it is NOT pretty. It’ll work, but damn. . . . I’ll let the pictures talk from here.

Image

Image

Image


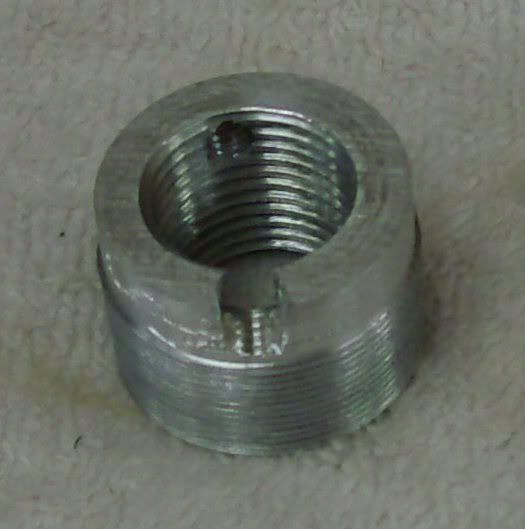
Next peace to work on was the tube support. In the mauser project this peace was threaded onto the muzzle end of the barrel and secured with a set screw. This one will be a little different. This time the peace will be a slip fit. The tolerances will be VERY close with a little bit of firm pressure to get it to actually “slip” onto the barrel. This peace will keep the barrel and tube in alignment so it needs to fit tightly.

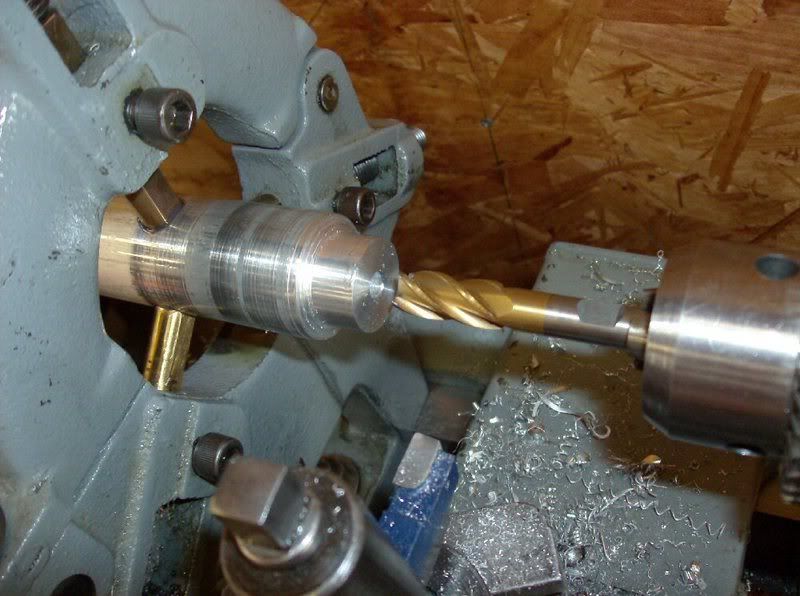
I took a little shortcut here and used an end mill to start things off. I had to finish it out using a boring bar so I could keep the tolerances tight.

Image

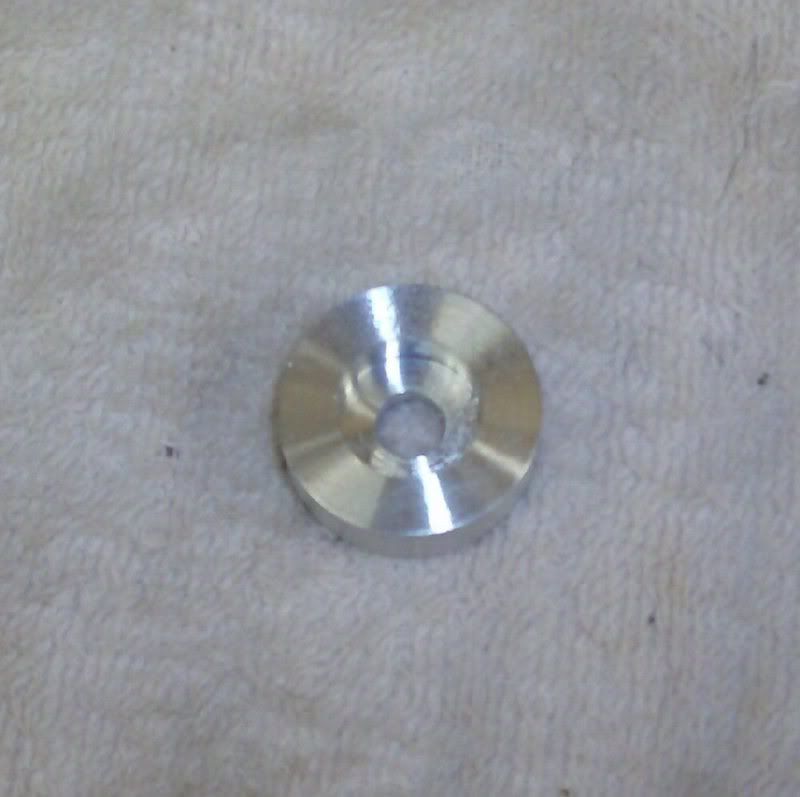
And the finished product.

Image

OK, that is where I’m at now. Well, not exactly, I was actually in the middle of cutting threads into the tube when I had to leave town but I don’t have any pics of that.

Please feel free to leave any comments, suggestions, questions as I enjoy discussing the project. Don’t get offended however if it takes a while for me to comment back. I’ll be leaving town tomorrow and will not have computer access for a while.

Thank you folks, it’s a fun project and fun to share. I’m just glad it’s taking less time than the Mauser project.
Last edited by L1A1Rocker on Sat Jul 16, 2011 7:59 pm, edited 1 time in total.
User avatar
jimmym40a2
Elite Member
Posts: 2745
Joined: Sun May 06, 2007 8:25 pm
Location: Colorado (for Mongo)

Post by jimmym40a2 »

thanks for taking the time to post it. Good luck with your family. Nice work.
http://www.youtube.com/watch?v=nEZJ_C4LwzA
User avatar
Jmark
Silent But Deadly
Posts: 1041
Joined: Wed Sep 26, 2007 6:43 am
Location: NE GA

Post by Jmark »

Very cool, thanks for taking the time to post this.
User avatar
JacksonBrowne
Silent But Deadly
Posts: 814
Joined: Sun Sep 02, 2007 9:30 am
Location: Lubbock, TX

Post by JacksonBrowne »

Very cool. Thanks for the update- can't wait to see the end product.
07/02 SOT
tmix
Silent But Deadly
Posts: 1778
Joined: Wed May 04, 2005 8:57 am
Location: The Lone Star State

Post by tmix »

I thought you were never supposed to thread aluminum and stainless together......something about galling the threads? :wink:
Why would you make you end cap out of stainless, but not your chamber support?
[size=150]Machine gun snob by proxy. [/size]
[img]http://i182.photobucket.com/albums/x190/tmixon762/Colt_Automatic_Rifle_01.jpg[/img]
User avatar
wolf
Silent But Deadly
Posts: 2591
Joined: Wed Nov 22, 2006 10:32 am

Post by wolf »

tmix wrote:I thought you were never supposed to thread aluminum and stainless together......something about galling the threads? :wink:
Why would you make you end cap out of stainless, but not your chamber support?
never thread bare aluminum and aluminum together :wink:
It "might never come apart again :cry:

Lube does the trick
tmix
Silent But Deadly
Posts: 1778
Joined: Wed May 04, 2005 8:57 am
Location: The Lone Star State

Post by tmix »

I would have rolled the tops of the threads with some emory cloth in an effort to prevent this issue. Just my .02.
(My first choice would not have been to try and mate aluminum and stainless for this reason.)
I've threaded aluminum/aluminum together many times without issue. (Hell, look at a maglite.) It all depends on what kind of alloy you are using and how you dress the threads after machining.
[size=150]Machine gun snob by proxy. [/size]
[img]http://i182.photobucket.com/albums/x190/tmixon762/Colt_Automatic_Rifle_01.jpg[/img]
User avatar
AAA
Industry Professional
Posts: 714
Joined: Sat Jul 09, 2005 6:17 pm

Post by AAA »

L1A1Rocker,

A couple of tips:

I notice you're using big long pieces of barstock and supporting it with a steady and machining parts off the end of it. If you have access to a horizontal drop style band saw or similar you may want to just cut bits off and machine them in the chuck it's much more rigid that way and less setup.

Re. The threads. As Tmix said, they're a little too rough. If you can't comfortably run your finger over them they need to be smooth out. You can use Emory or scotch bright pads. The problem with using HSS cutters on tough materials like you're doing is, unless they ground properly, they dull very quickly. If you have any threading questions, feel free to PM me. I have a little experience in this area. :D
Tornado Technologies
Mailing Address:
22115 NW Imbrie Drive #181
Hillsboro OR 97124
PH: (503)690-8000
Web: www.tornado-technologies.com
tmix
Silent But Deadly
Posts: 1778
Joined: Wed May 04, 2005 8:57 am
Location: The Lone Star State

Post by tmix »

AAA wrote:L1A1Rocker,

A couple of tips:

I notice you're using big long pieces of barstock and supporting it with a steady and machining parts off the end of it. If you have access to a horizontal drop style band saw or similar you may want to just cut bits off and machine them in the chuck it's much more rigid that way and less setup.

Re. The threads. As Tmix said, they're a little too rough. If you can't comfortably run your finger over them they need to be smooth out. You can use Emory or scotch bright pads. The problem with using HSS cutters on tough materials like you're doing is, unless they ground properly, they dull very quickly. If you have any threading questions, feel free to PM me. I have a little experience in this area. :D
I agree.
[size=150]Machine gun snob by proxy. [/size]
[img]http://i182.photobucket.com/albums/x190/tmixon762/Colt_Automatic_Rifle_01.jpg[/img]
User avatar
L1A1Rocker
Silent But Deadly
Posts: 3578
Joined: Wed Feb 21, 2007 5:40 pm
Location: Texas Hill Country

Post by L1A1Rocker »

Thanks for the suggestions guys!
canenvy
Member
Posts: 29
Joined: Thu Nov 29, 2007 9:41 pm

Post by canenvy »

is this a baffle?
Image
User avatar
wolf
Silent But Deadly
Posts: 2591
Joined: Wed Nov 22, 2006 10:32 am

Post by wolf »

tmix wrote:I would have rolled the tops of the threads with some emory cloth in an effort to prevent this issue. Just my .02.
(My first choice would not have been to try and mate aluminum and stainless for this reason.)
I've threaded aluminum/aluminum together many times without issue. (Hell, look at a maglite.) It all depends on what kind of alloy you are using and how you dress the threads after machining.
In The maglite it isnt bare aluminum

freshly cut clean aluminum tends to freeze together when you tighten it

And for the rough threads ,you also can clean some of it out with a steel brush
User avatar
3101
Silent But Deadly
Posts: 5379
Joined: Mon Dec 18, 2006 3:55 pm
Location: Northeast Georgia...near UGA

Post by 3101 »

canenvy wrote:is this a baffle?
Image
he says it is his tube support....
Mr. Burns: This anonymous clan of slack-jawed troglodytes has cost me the election, and yet if I were to have them killed, I would be the one to go to jail. That's democracy for you.
Smithers: You are noble and poetic in defeat, sir.
User avatar
Artful
Silent But Deadly
Posts: 4392
Joined: Wed Aug 17, 2005 10:47 pm
Location: Phx,AZ
Contact:

Post by Artful »

Tube support
check out part 3 for better idea where it goes.
"Trying to tax yourself into prosperity is like standing in a bucket and trying to pick yourself up by the handle." - Winston Churchill
Closed Casket
Silent Operator
Posts: 61
Joined: Thu May 22, 2008 1:25 pm
Location: BEHIND YOU

Post by Closed Casket »

Glad to see you back.

One thing I noticed with SRT and Gemtech(Quantum) integrals is that the receiver acts as a support for the rear of the tube. Apparently, the front of the receiver is machined to the ID of the tube about .150" back to give the tube a nice clean mating space behind the rear barrel boss. Then the OD of the tube is cut to match the receiver which is about .996".

Both the SRT and Gemtech use a soldered barrel boss on the muzzle end that is attached to the tube. The end of the barrel is threaded and the barrel boss is what holds it. I have a Gemtech that fits really tight and takes a bit of torque to line up the set screw that is under the receiver. this one seems to put the barrel in tension. The SRT is loose as a goose. it actually will turn past the set screw hole.
Last edited by Closed Casket on Sun Nov 06, 2011 1:21 am, edited 1 time in total.
Closed Casket
Silent Operator
Posts: 61
Joined: Thu May 22, 2008 1:25 pm
Location: BEHIND YOU

Post by Closed Casket »

BTW, the SRT leaks gas and other foul s--t from the tube/receiver joint. Since the Gemtech has an o ring, it does not.

The barrel is turned 1/2" and the threads are 28tpi. It appears a target barrel gun was used on the Gemtech, but the barrel od was not enough to mate to the tube's id so a rear barrel boss was installed there too. This is where the o ring is. You can see the seam of the boss where it meets the barrel.

This was a well thought out setup. The Gemtech appears to be of higher quality in regards to attention to detail. However, the SRT does sound better o the first 2 shots. This may be the 1997 vs. 2001 technology or the added 1" of the SRT. I think there was a big improvement during this period.

I deleted the gemtech cup and spring in the blast area and added a chore boy copper scrub twisted in there. It helped the first round pop tremendously.

SRT has screen in it. I laughed when I saw it.
Post Reply