I ordered 12" of 1.5 OD 0.070" wall(GR9), 12" of 1.375 OD 0.054" wall(GR9), and a 4.75" long 1.5 OD bar(GR5). If the guy with the tube will combine shipping it'll be just shy of $200.john.t.little1 wrote:Kuraki wrote:If I change everything but the baffles to Ti, it get's down to 26 oz. So whatever cost difference between sst and Ti for 30% weight reduction.
Looking at Ebay, basically $210 for Ti unless I can get some combined shipping.
For SST all I need to buy are the tubes for the tube and spacers, about $80 shipped from Online metals. So $120 to shave 10 oz. $12 an oz. Eeesh.
Screw it. I'm going to go for it.
What length of Ti? and is that tube and bar?? i got all mine off ebay and it was 2' of bar 1.5" G5 and 1' of 1.5" tube G9..
Please review/critique my Form 1 design - Updated pg2 -Finished
Re: Please review/critique my Form 1 design
Last edited by Kuraki on Thu Sep 04, 2014 1:14 pm, edited 1 time in total.
Re: Please review/critique my Form 1 design
I couldn't find bar stock for the baffles at a price I wanted to pay when I have all kinds of various SST and alloy or tool steel drop I can use for free or already have on hand. I could do 440V, 316, 304, 4140, 4130, H13, and the weight difference between a steel baffle stack and Ti baffle stack is only 2 oz overall, plus, since I have to machine them the way I do, I'm more confident doing it in steel since I've worked with Ti about once 10 years ago.john.t.little1 wrote:Kuraki wrote:If I change everything but the baffles to Ti, it get's down to 26 oz. So whatever cost difference between sst and Ti for 30% weight reduction.
All material for my "Ti-Thirty" can was <$200 thats spacers baffles and tube…
Why not do the whole thing from Ti??
-
john.t.little1

- Silent But Deadly
- Posts: 243
- Joined: Thu Nov 24, 2011 12:13 pm
- Location: florida/iraq
Re: Please review/critique my Form 1 design
Certain peoples prices are cheaper on eBay for Ti. A Ti baffle stack should be a lot more than 2oz lighter if I'm not mistaken. But honestly it's more nitpicking than anything I'm not trying to step on your toes in my last posts just offering help/suggestions. Build it with the steel baffles it'll be heavier but it'll be a tank and you shouldn't have any issues at all..
"A man is known by the silence he keeps. - Oliver Herford"
"Gunpowder, treason and plot. I see no reason why gunpowder, treason
Should ever be forgot..."
"Gunpowder, treason and plot. I see no reason why gunpowder, treason
Should ever be forgot..."
Re: Please review/critique my Form 1 design
Oh, I haven't taken it that way at all John, I appreciate your feedback. I'm just trying to explain the decisions I'm making and why. As for the weight, I can only go by what Inventor is telling me.john.t.little1 wrote:Certain peoples prices are cheaper on eBay for Ti. A Ti baffle stack should be a lot more than 2oz lighter if I'm not mistaken. But honestly it's more nitpicking than anything I'm not trying to step on your toes in my last posts just offering help/suggestions. Build it with the steel baffles it'll be heavier but it'll be a tank and you shouldn't have any issues at all..

Re: Please review/critique my Form 1 design
ti is roughly 40% less weight than ss per same sized part. just saying.
design is damn good. adding baffles and closing the space in the second half look like a great mod (same way ive been doing mine latest designs).
design is damn good. adding baffles and closing the space in the second half look like a great mod (same way ive been doing mine latest designs).
NP

Re: Please review/critique my Form 1 design
Really nice to see a F1 build with a ratchet QD mount. I decided not spend the extra time on it, and have regretted the decision ever since.
The latest design looks great overall. You'll be pleased with it I think!
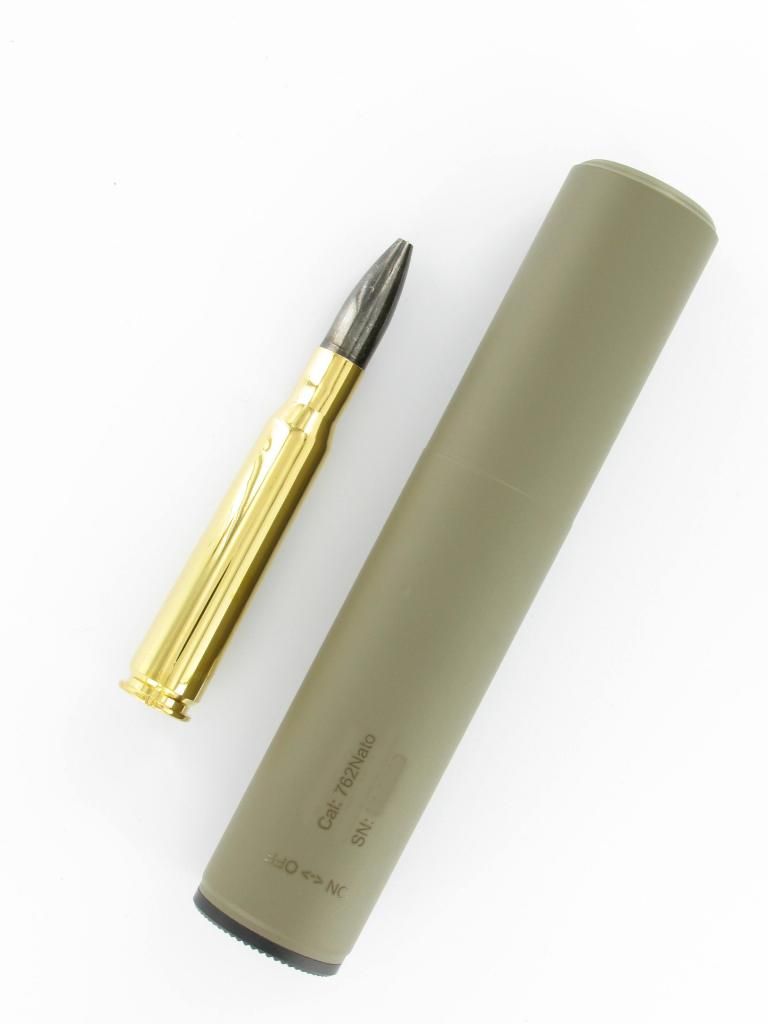
p.s sweet stick, the can will look great in it.
The latest design looks great overall. You'll be pleased with it I think!
p.s sweet stick, the can will look great in it.
https://www.facebook.com/wickedweapons

Re: Please review/critique my Form 1 design
I own two welded .223 form 4 cans and have always wanted to be able to dissemble them for cleaning. Also, while I'm perfectly comfortable tigging a steel can I don't have the faintest idea how to weld Ti.delta9mda wrote:op, why the threaded caps?
Re: Please review/critique my Form 1 design
Is it anything like welding aluminum?
Maybe I'll research. I certainly have the equipment at my disposal.
eta: I see. Highly reactive. I would need a chamber otherwise I think I could tackle that with a couple test samples.
Maybe I'll research. I certainly have the equipment at my disposal.
eta: I see. Highly reactive. I would need a chamber otherwise I think I could tackle that with a couple test samples.

Re: Please review/critique my Form 1 design
Kuraki wrote: eta: I see. Highly reactive. I would need a chamber otherwise I think I could tackle that with a couple test samples.
Chamber is not needed if you follow certain roles.
Backing-gas inside your can at right volume.
Trailing sock with additional gas connection
Gas lens
Do some test you will see, also if you make a small welding lathe you can weld these perfect, no need for laser welding or special chamber.
Extra connections and backing gas will do you well.
All the cans I weld are welded with backing gas on my shop made welding lathe.
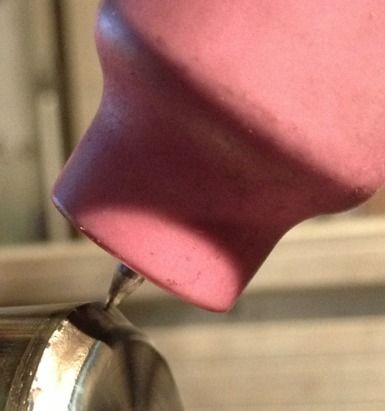
lathe pictures of trial setup
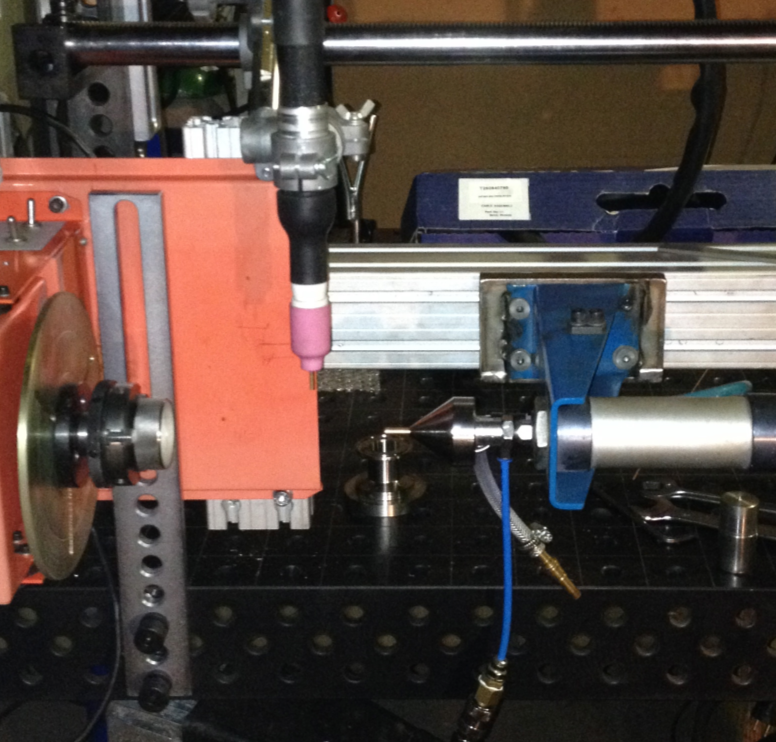
back in gas on center
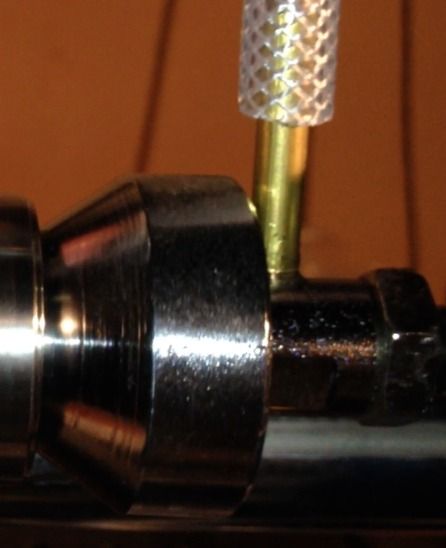
welding 50MBG core
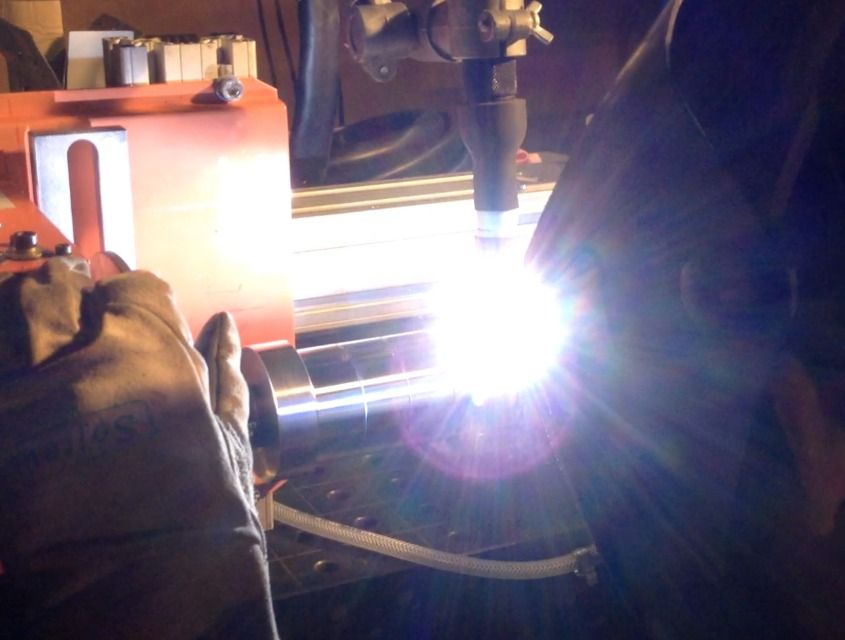
weld core in tube - connector side
welding setup for endcap - connector side on centers - special adapter inside the core
welding of end cap complete
followed by outside machining, ceracote, installing locking ring and laser engraving
Currently rebuilding my welding lathe to get its own welding station also adding new x-y-z- spindles so I can adjust the welding head faster, including a digital scale on X axes for core welding adjustments.
I can see some thinking X Y Z on a lathe? Well one should see the adjusting operations like a mill, welding head needs adjustment in Z direction (diameter of silencer) X direction (baffle core) Y direction for loading and unloading the core / silencer from the lathe. This so you do not have to adjust Z al the time you weld more than one product of same dimension.

Gunny
-
john.t.little1
- Silent But Deadly
- Posts: 243
- Joined: Thu Nov 24, 2011 12:13 pm
- Location: florida/iraq
Re: Please review/critique my Form 1 design
I made the chamber We used to weld mine out of a old shipping container. It's about the size of a five gallon bucket. Actually if you were to get a five gallon bucket with lid cut hand holes at top "lid" and bottom than fashion a window so you could see I used some old thin plexi glass that's all you'd need fill the bucket and have a extra line or two to help gas cover part.
"A man is known by the silence he keeps. - Oliver Herford"
"Gunpowder, treason and plot. I see no reason why gunpowder, treason
Should ever be forgot..."
"Gunpowder, treason and plot. I see no reason why gunpowder, treason
Should ever be forgot..."
Re: Please review/critique my Form 1 design
Very cool setup Gunny. Awesome welds.gunny50 wrote:Kuraki wrote: eta: I see. Highly reactive. I would need a chamber otherwise I think I could tackle that with a couple test samples.
Chamber is not needed if you follow certain roles.
Backing-gas inside your can at right volume.
Trailing sock with additional gas connection
Gas lens
Do some test you will see, also if you make a small welding lathe you can weld these perfect, no need for laser welding or special chamber.
Extra connections and backing gas will do you well.
All the cans I weld are welded with backing gas on my shop made welding lathe.
lathe pictures of trial setup
back in gas on center
welding 50MBG core
weld core in tube - connector side
welding setup for endcap - connector side on centers - special adapter inside the core
welding of end cap complete
followed by outside machining, ceracote, installing locking ring and laser engraving
Currently rebuilding my welding lathe to get its own welding station also adding new x-y-z- spindles so I can adjust the welding head faster, including a digital scale on X axes for core welding adjustments.
I can see some thinking X Y Z on a lathe? Well one should see the adjusting operations like a mill, welding head needs adjustment in Z direction (diameter of silencer) X direction (baffle core) Y direction for loading and unloading the core / silencer from the lathe. This so you do not have to adjust Z al the time you weld more than one product of same dimension.
Gunny
Re: Please review/critique my Form 1 design
I second Kuraki's admiration!
A loud 'Wow!'.
Best.
A loud 'Wow!'.
Best.
Re: Please review/critique my Form 1 design
Kuraki, what spring are you planing to use on this ratchet? I use this similar design on my first can, but the spring cannot hold high temperature, always broken and need replacement after a a few rounds, so I switch back to original aac design.Kuraki wrote:
With the back of the cap split away to see:

Re: Please review/critique my Form 1 design
Sorry for the delay. I had this done shortly after getting my form back, but it's been a very busy time for me and I haven't been able to get pictures taken and uploaded until now. Also, I apologize for the lack of in process pictures, I simply did not have time when I was able to get into the shop I had to make my chips and get it done. That said, here it is, and I'll throw in pics of the monocore .22 can I did shortly after the Ti can as well:
Fully assembled

Ratchet close ups, this is retained by a 4-40 stainless set screw which acts as the pivot and actuated by a 0.035" thick spring. The spring design took me the longest of any other single part of this can, a lot of trial and error. It is made from A2 and heat treated and drawn back to about 55 RC. It's 0.065" thick and unlike the AAC design it relies on a single pawl.


Endcap removed. Dirty, from 300 BO subs. As I was processing the parts I realized I had a little spanner wrench in my toolbox but it wasn't for anything, so rather than the design shown in my models, I just did a hole pattern to match.


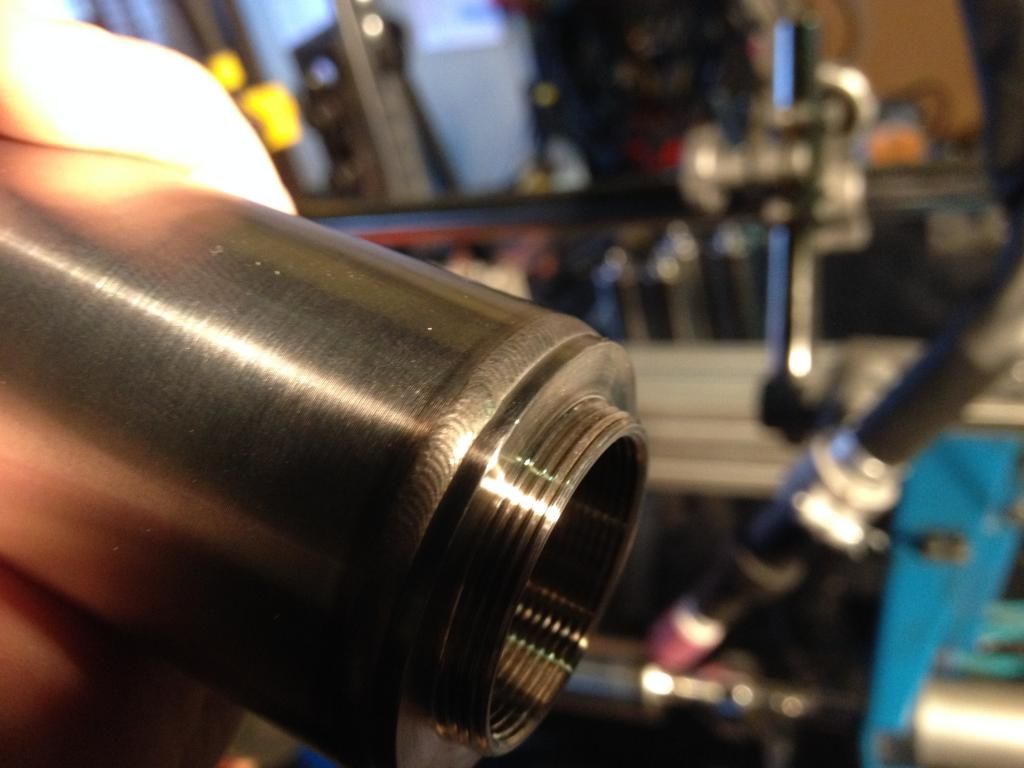
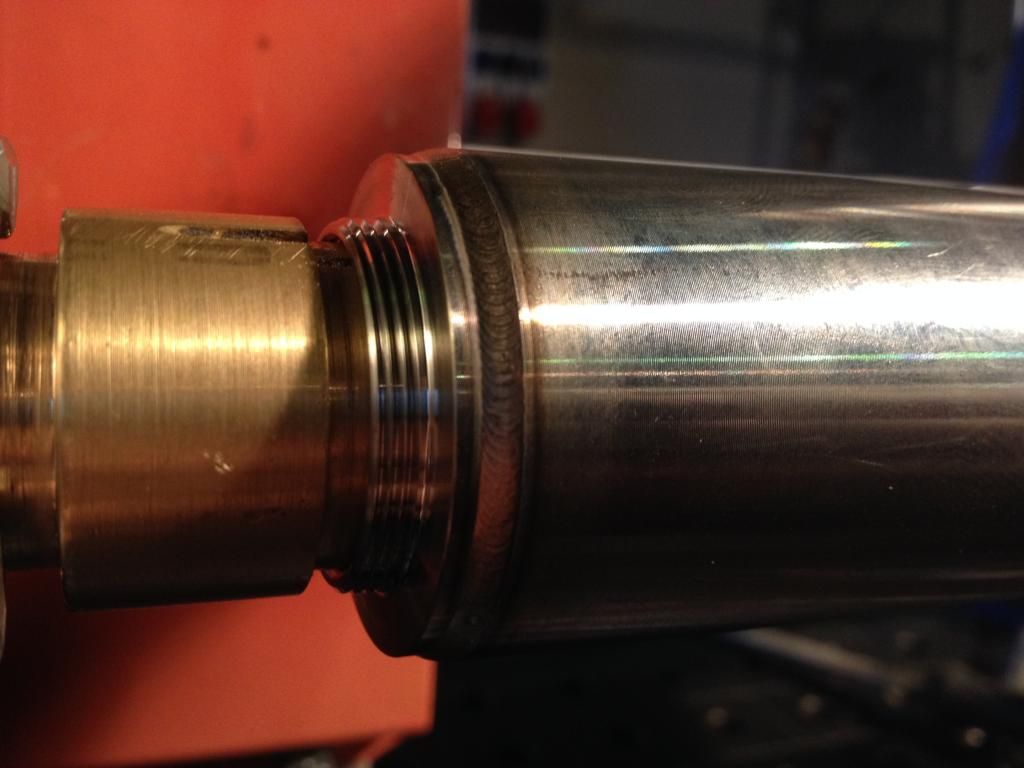
Regarding concerns about thread separation and leakage under heat on a non-welded can- I used 18 TPI threads, and the shoulders of both endcaps have rebated profiles which match chamfered shoulders on the exterior tube. My hope being that when assembled the caps are able to retain the tube as it heats up. Whether that's effective or not I don't know, I haven't gotten this very warm yet and I've only shot a few full power centerfire rounds through it (6.5x55). We'll see what happens when I get a mount made for my RPD


I didn't remove the mounting endcap, as it's rockset in place. Here are the baffles. They are 4140 cones, milled to the profile shown in the models, with the Ti spacers pressed on. They were pressed and then turned between centers to fit the bored ID of the exterior tube.


Here's my little .22 can. Pretty simple design. It is anodized now, but left natural color. The tube is 6061 and when left natural it's taken on a rainbow like hue in the right light. The monocore is 7075.


As for performance, I'm happy with both, but I don't really have anything to compare them to. I own two 5.56 cans, Griffin Armament Spartans, and the best comparison I can make is that on the 6.5x55 this is at least as effective as they are on 5.56. When shooting subsonic 300 BO, it seems to be as effective as what I've seen in videos but that's a poor metric. The .22 can, same thing. It's definitely quiet on my Mark 3, and it's stupid quiet on a bolt action with subsonics, but on a rifle with HV supers it's hard to tell it's even on the gun.
I'll try and update this with pics on guns and video as soon as I can, also with my mounts. I'm really happy with the way the QD system turned out on the Ti can. Screw it on, clickclicklclick, shoot. On off, on off, no problem. 1" POI shift on my 6.5x55 at 100 yards, which I really can't complain about. I have not tested how repeatable that 1" shift it, but the couple times I check it, it literally shifted 1" up each time.
Fully assembled
Ratchet close ups, this is retained by a 4-40 stainless set screw which acts as the pivot and actuated by a 0.035" thick spring. The spring design took me the longest of any other single part of this can, a lot of trial and error. It is made from A2 and heat treated and drawn back to about 55 RC. It's 0.065" thick and unlike the AAC design it relies on a single pawl.
Endcap removed. Dirty, from 300 BO subs. As I was processing the parts I realized I had a little spanner wrench in my toolbox but it wasn't for anything, so rather than the design shown in my models, I just did a hole pattern to match.
Regarding concerns about thread separation and leakage under heat on a non-welded can- I used 18 TPI threads, and the shoulders of both endcaps have rebated profiles which match chamfered shoulders on the exterior tube. My hope being that when assembled the caps are able to retain the tube as it heats up. Whether that's effective or not I don't know, I haven't gotten this very warm yet and I've only shot a few full power centerfire rounds through it (6.5x55). We'll see what happens when I get a mount made for my RPD
I didn't remove the mounting endcap, as it's rockset in place. Here are the baffles. They are 4140 cones, milled to the profile shown in the models, with the Ti spacers pressed on. They were pressed and then turned between centers to fit the bored ID of the exterior tube.
Here's my little .22 can. Pretty simple design. It is anodized now, but left natural color. The tube is 6061 and when left natural it's taken on a rainbow like hue in the right light. The monocore is 7075.
As for performance, I'm happy with both, but I don't really have anything to compare them to. I own two 5.56 cans, Griffin Armament Spartans, and the best comparison I can make is that on the 6.5x55 this is at least as effective as they are on 5.56. When shooting subsonic 300 BO, it seems to be as effective as what I've seen in videos but that's a poor metric. The .22 can, same thing. It's definitely quiet on my Mark 3, and it's stupid quiet on a bolt action with subsonics, but on a rifle with HV supers it's hard to tell it's even on the gun.
I'll try and update this with pics on guns and video as soon as I can, also with my mounts. I'm really happy with the way the QD system turned out on the Ti can. Screw it on, clickclicklclick, shoot. On off, on off, no problem. 1" POI shift on my 6.5x55 at 100 yards, which I really can't complain about. I have not tested how repeatable that 1" shift it, but the couple times I check it, it literally shifted 1" up each time.
Re: Please review/critique my Form 1 design - Updated pg2 -Finished
I almost forgot, thank you everyone who contributed to helping me refine my design. When I look back at my first revision I'm very glad I came here first 
Re: Please review/critique my Form 1 design
I scrapped the design you have quoted and never updated. I don't have a model of my changes. I realized it would be much easier to make the pawl match my steps if I flipped it 180, and that I didn't have room for a coil spring, so I'm using a single wire spring similar to AAC.sizulku wrote:Kuraki, what spring are you planing to use on this ratchet? I use this similar design on my first can, but the spring cannot hold high temperature, always broken and need replacement after a a few rounds, so I switch back to original aac design.Kuraki wrote:
With the back of the cap split away to see:
Re: Please review/critique my Form 1 design - Updated pg2 -Finished
Very impressive and I think a first here for a ratchet mount in a Form 1 can
Re: Please review/critique my Form 1 design - Updated pg2 -Finished
I finally got to the range. 120 grain Sierra MBTHP, 48 grains of RL22, 2900 FPS. I shot a 15 round group, 5 rounds suppressed, removed can, 5 rounds unsuppressed, reinstalled can, 5 rounds suppressed. Pretty happy with this POI shift.  The group on the lower right was a load test of a 140 grain load.
